
Amy Brown Science | Biology and Chemistry Teaching Resources for Middle and High School
menu Home About Me Home Freebies My Store
Amy Brown Science Facebook    Amy Brown Science Instagram    Amy Brown Science Pinterest    Amy Brown Science Teachers Pay Teachers    Email Amy Brown Science

Search My Blog

Real Science Teaching. Real Classroom Experience.

I’m Amy Brown, a veteran high school biology and chemistry teacher, wife, and mom who understands the daily reality of lesson planning, grading, meetings, and everything in between. I know what it feels like to have too much to do and not enough time to do it.

After decades in the classroom, I’ve created rigorous, classroom-tested biology and chemistry resources that save you planning time while still delivering strong, meaningful science instruction. Every lab, activity, and lesson is designed to move students beyond memorization and into real scientific thinking.

If you want your students excited about science and thinking deeply without spending your entire weekend planning, you’re in the right place.

Amy Brown Biology and Chemistry Teacher

“I just love getting kids hooked on science.”

5 Science Skills Your Students Are Missing (and Easy Ways to Teach Them in Class))

Science skills for students go far beyond following directions in a lab. High school science students need opportunities to design experiments, analyze data, solve problems, and communicate evidence clearly. These science skills help students think like real scientists while building confidence across biology, chemistry, and physical science.

If your students can complete a lab but struggle to explain their thinking, interpret messy results, or design their own investigations, they may need more practice with core science skills. The good news is that you do not need to overhaul your curriculum to build these skills. A few targeted activities can make a big difference.

What science skills should students learn?

Science students need more than content knowledge. They need skills that help them think, analyze, and communicate like real scientists. The most important science skills include:

• Designing experiments
• Interpreting data and graphs
• Writing evidence-based explanations
• Solving quantitative problems
• Communicating scientific ideas

These science skills, often referred to as science process skills, are the difference between students who memorize content and students who truly understand how science works. 

What Are Science Skills?

Science skills are the thinking, reasoning, problem solving, and communication skills students use to investigate questions and make sense of evidence. These include skills such as designing experiments, interpreting graphs, writing evidence based explanations, solving quantitative problems, and communicating scientific ideas clearly.

These are the same kinds of skills students use when they create a hypothesis, identify variables, analyze a data table, explain a trend on a graph, or defend a conclusion with evidence. If you want a broader look at essential science process skills, you may also like my post on 17 essential science skills all students need.

Here are five important science skills for students that will help keep learners engaged, challenged, and growing all year long. These strategies are designed specifically for high school science students but can be adapted for middle school classrooms as well.

1. Designing Original Experiments

Many science students perform traditional labs perfectly but freeze when asked to create their own investigations. They have mastered following directions, but not designing experiments. Learning how to plan an investigation is one of the most important science skills students can develop.

How to challenge them:

  • Let students redesign one of your favorite labs by changing one variable.
  • Have them identify independent, dependent, and controlled variables.
  • Ask students to write their own hypothesis, procedure, and data table.
  • If time allows, add a peer review round before anyone begins the lab.

Students quickly discover that experimental design requires both creativity and critical thinking. If you want more ideas for teaching this skill, you might also like Teach the Skills, Please and applying scientific methods in class.


💡 Ready made help: Try my Scientific Method and Experimental Design Lab, a scaffolded activity that walks students through the process of planning their own experiment from scratch. It is editable, printable, and includes a full teacher guide and answer key.

2. Interpreting Complex Data and Graphs

Science students often learn how to make neat graphs, but many still struggle to interpret what the data actually means. They may miss trends, overlook anomalies, or have trouble explaining possible sources of error. Interpreting data is one of the most valuable scientific skills for students because real science is rarely neat and tidy.

How to challenge them:

  • Present messy data sets from real world studies or classroom experiments.
  • Ask students to identify trends, outliers, and possible sources of error.
  • Have them explain what might happen if one variable changed.
  • Encourage students to support their observations with evidence from the graph or table.

This strengthens scientific reasoning and helps students move beyond simply making graphs. For more practice with comparing and interpreting observations, you may also like science skills for comparing and classifying.


💡 Ready made help: My Graphing and Data Analysis Worksheets and Quiz make a great bridge between basic graphing and higher level interpretation. They are fully editable and perfect for differentiating within one class period.

3. Writing Evidence Based Explanations

Even strong students sometimes write weak conclusions. They summarize what happened in the lab, but skip the reasoning behind the results. Writing evidence based explanations helps students connect observations to scientific ideas, which is a skill they will use in every science course.

How to challenge them:

  • Use the CER model, which stands for Claim, Evidence, and Reasoning, to structure student thinking.
  • Show examples of both strong and weak lab conclusions for students to critique.
  • Have students revise a weak paragraph using evidence drawn directly from their data.
  • Ask students to explain not just what happened, but why it happened.

These practices strengthen communication and clarity while helping students think more deeply about the science. Strong scientific writing also supports success in other content areas and on assessments.


💡 Ready made help: My Scientific Writing and Analysis Worksheets help students craft well supported explanations and practice scientific writing step by step.

4. Quantitative Problem Solving

Quantitative problem solving is another key science skill for students. When students use numbers to explain real phenomena, science becomes more meaningful. Whether students are calculating moles, density, percent composition, or changes in mass during osmosis, math helps them see the evidence behind the concept.

How to challenge them:

  • Embed calculations within engaging, real life examples.
  • Ask students to explain in words what each number means.
  • Use examples such as density, percent composition, mole conversions, or membrane transport data.
  • End with a what if question that changes one part of the problem.

If your students need more support with the math side of science, you may also want to read Unlock Success in Science by Mastering Math Skills.


💡 Ready made help: Chemistry teachers can check out my Mole Chat Lab Station Activity. Biology teachers may prefer my Cellular Membrane Transport Lab.

5. Communicating Like a Scientist

Science is not just about getting correct results. Students also need to communicate their ideas clearly and accurately. When students can explain vocabulary, defend a conclusion, present data, and summarize a process for others, they are demonstrating real mastery.

How to challenge them:

  • Have students present lab findings and conclusions to classmates.
  • Use peer review checklists to give structured feedback on clarity and accuracy.
  • Ask students to create an infographic, slide, or visual summary of an investigation.
  • Encourage students to explain scientific vocabulary in language non experts can understand.

Communicating science effectively builds confidence and helps students transfer their learning to other classes and real life situations.

If you want students to strengthen communication while applying science concepts, this is another area where skill based instruction really pays off.

💡 Ready made help: My Evolution Lab, Making Coacervates includes a student designed experiment and opportunities for students to communicate findings in a written lab report or by sharing their experiment orally with classmates.

Final Thoughts

Challenging students in science does not mean assigning more work. It means giving them better opportunities to think, reason, solve problems, and communicate like scientists. Focusing on core science skills helps students succeed not only in science class, but across disciplines.

What are science skills?

Science skills are the abilities students use to think, analyze, experiment, and communicate like scientists. These skills include experimental design, data analysis, scientific writing, and problem-solving.

Why are science skills important for students?

Science skills help students move beyond memorization and develop critical thinking, communication, and analytical abilities that can be used across many subjects.

What are science process skills?

Science process skills are the tools students use during scientific investigations, including observing, measuring, hypothesizing, interpreting data, and drawing conclusions.

How can teachers improve science skills in the classroom?

Teachers can improve science skills by using inquiry labs, graphing activities, CER writing, student-designed experiments, and collaborative scientific discussions.

Looking for more classroom ideas? Be sure to read my blog post, The Ultimate Guide to Teaching Science Process Skills, where you'll find dozens of teaching strategies, classroom activities, and science resources all in one place.

If you are looking for more ways to strengthen science skills in your classroom, you may also like these related posts:

💡 Ready made help: Explore my Science Skills Mega Bundle filled with labs, notes, quizzes, and digital activities to make skill building seamless and fun.

Planning your biology course? Download my free 189-page Biology Curriculum Teacher Guide to see exactly how I organize an entire school year.

Are your students struggling with the math side of chemistry? Before students can be successful in a chemistry class, they need a strong foundation in scientific measurements, significant figures, scientific notation, dimensional analysis, graphing, and more. This blog post tells you how I teach these essential skills, and shows examples of my complete Chemistry Measurement Unit that prepares students for success all year long.

Making the Mole Concept Click and Stick: Lab Stations That Bring Avogadro’s Number to Life

Looking for a mole lab activity for high school chemistry that helps students actually understand the mole concept, mass and mole conversions, and Avogadro's number? This hands on chemistry activity is designed to make one of the hardest chemistry topics more concrete, more interactive, and much easier for students to understand.

If you’ve ever taught high school chemistry, you know that the mole concept is one of the most important concepts we teach. The mole concept is likely a brand new idea to most students in your class. The idea of a mole and Avogadro’s number of atoms and molecules involves numbers so large that students can’t visualize them. The year of chemistry is going to involve endless conversions between mass, moles, and molecules. Students need to grasp this concept quickly because the truth is, the mole is the backbone of chemistry. Without a strong foundation in this concept, everything from stoichiometry to chemical reactions becomes a stumbling block.

That’s exactly why I created my Mole Chat Lab Stations. Instead of another worksheet packed with endless conversion problems, this activity gets students up, moving, and experimenting. It is obvious to us teachers that students retain significantly more information when they engage in hands on scientific activities, rather than solely performing calculations on paper.

👉 TL;DR? Check out the Mole Chat Lab Stations here.

What Is the Mole Concept in Chemistry?

The mole is a counting unit in chemistry. Just as a dozen means 12 items, a mole represents a very large number of particles. That number is Avogadro’s number, which is 6.02 x 10²³ particles. Students use the mole to connect tiny particles such as atoms and molecules to measurable amounts such as grams.

This is exactly why the mole concept can feel so difficult at first. Students are being asked to connect a microscopic world they cannot see with real quantities they can measure in the lab. A strong mole concept activity or mole lab can make that connection much more understandable.

If your students need more practice applying mole conversions to a full activity, you might also like this post on how big is a mole in chemistry.

Why Is the Mole Concept So Difficult for Students?

Many students struggle with the mole concept because it combines very large numbers, abstract particles they cannot see, and multiple types of conversions. Students must connect atoms and molecules to grams and measurable lab data, and that takes practice. A good mole lab activity helps students visualize the concept, talk through their thinking, and apply mole conversions in a way that feels more concrete.

That is why hands on activities are so helpful during a mole unit. Instead of only solving problems on paper, students can interact with real materials and begin to see how the mole connects chemistry calculations to the real world.

Why the Mole Concept Matters

The mole is the great connector in chemistry. It connects the microscopic world of trillions and trillions of atoms and molecules with the tangible grams and liters students actually measure in the lab. Mastering mole conversions means students can confidently answer questions like:

  • How many water molecules are in a single drop?
  • What mass of sucrose is found in a soft drink?
  • How much CO₂ is released from an Alka Seltzer tablet?

When students understand the mole concept, chemistry becomes logical rather than mysterious and confusing. Take the time to make sure all students have mastered this concept. The time spent practicing and reviewing mole conversions will benefit our students all year long.
Many chemistry topics become easier once students understand the mole. If you are building a full chemistry sequence, related lessons like composition of a hydrate and percent composition also depend on students being comfortable with mole thinking and chemical calculations.

Lab Stations Are a Better Way to Practice

Traditional worksheets have their place in our chemistry classes. There are often times that a calculation needs to be practiced and there is not enough time to turn it into a game or lab. Honestly, relying on a practice problem worksheet is not a bad thing. But, if the opportunity arises where the problems can be practiced using a lab activity, great! This kind of mole lab gives students a more meaningful way to practice than a worksheet alone.

With the Mole Chat Lab Stations, students rotate through 8 different mini experiments, each designed to spark curiosity and connect calculations to real world objects and data. In the Mole Chat Lab Stations, students will

  • Determine the number of molecules of chalk it takes to write their name.
  • Determine the number of moles of carbon dioxide given off when they create a mini volcano in a beaker.
  • Determine the number of moles and molecules of sucrose contained in a pack of M&M candies.

Each station reinforces the key skills students need, but in a way that keeps them engaged, interested, and collaborating. It transforms a tough topic into an active, hands on learning experience.

🧪 What This Looks Like in Your Classroom

This mole lab activity for high school chemistry works well when students need meaningful practice with mass, moles, molecules, and Avogadro’s number without sitting through another full period of paper and pencil problems. Students move from station to station, interact with materials, discuss ideas with partners, and apply chemistry calculations in a setting that feels much more concrete. Because this mole lab activity is built around movement, discussion, and short tasks, students stay engaged while practicing difficult chemistry concepts.

It can be used while teaching the mole concept for the first time, as review before an assessment, or later in the year when students need a refresher before moving into more advanced chemistry topics. Because students are doing short tasks and mini experiments, the activity keeps energy up while still reinforcing core chemistry skills.

Why Teachers Love Mole Chat

Low prep, high impact: No fancy materials or supplies are needed, all the lab station signs and worksheets are ready to be copied and passed out to students, and the setup time is minimal.

Versatile use: Perfect for review before an assessment, as a practice activity while teaching the mole unit, or as a fun refresher later in the year.

Confidence boost: Even your most reluctant students will walk away feeling like they finally understand Avogadro’s number.

For teachers looking for a hands on mole activity, mole concept lab, or Avogadro’s number activity that does more than a worksheet alone, this resource gives students a chance to practice, talk through their thinking, and make the chemistry feel more real.

Final Thoughts

The mole doesn’t have to be the hardest unit of the year. With the Mole Chat Lab Stations, you can swap worksheets for meaningful mini experiments that help the concept click and stick. Your students will be talking about these activities long after they leave class. You’ll love seeing those “aha” moments when everything clicks. If you have been searching for a mole lab for high school chemistry, this activity gives students the practice they need in a format they will actually remember.

👉 Grab the Mole Chat Lab Stations here and make mole conversions fun.

FAQ About Teaching the Mole Concept

What is a mole in chemistry?
A mole is a counting unit chemists use to represent 6.02 x 10<sup>23</sup> particles. It helps students connect atoms and molecules to measurable amounts such as grams.

Why is the mole concept difficult for students?
The mole concept is difficult because students must connect invisible particles, very large numbers, and multiple conversion steps. Hands on practice helps make the idea more understandable.

What is a good way to teach mole conversions?
A good way to teach mole conversions is to combine direct instruction with a hands on mole lab or station activity so students can apply calculations in a more concrete setting.

More Chemistry Lab Activities

If you are teaching mole calculations and related chemistry concepts, these blog posts may also be helpful:

End of Year Biology Activity: Fun Science Project for Middle and High School

Looking for an end of year biology activity that is fun, creative, and still academically meaningful? This end of year science project gives middle school and high school students the chance to research unusual plants and animals, create a Planet Earth Award, and present their work to the class. If you need an engaging biology project for the last week of school, an Earth Day activity, or even a first week icebreaker, this resource is a flexible option that students genuinely enjoy.

My Mother Nature Planet Earth Awards combine science research, creativity, and presentation skills in a way that feels more like fun than just another assignment. Students choose a unique plant or animal, research its traits and habitat, decide what award it deserves, and then create their own award slide or poster to share with the class.

This activity works especially well at the end of the year when students need something fresh and engaging, but it also fits beautifully into a biology or life science classroom any time you want a creative organism research project.

What Is the Planet Earth Awards Biology Project?

This end of year biology project includes a set of colorful Mother Nature Award slides that highlight unusual living things on Earth, along with a student research activity that lets students create their own award-winning organism project. The organisms featured in the slides are strange, amazing, and memorable, which makes this an easy way to spark curiosity in a biology or life science class.

Students can research plants or animals and answer questions about classification, habitat, range, nutrition, interesting facts, and conservation status. They then use that research to design a Planet Earth Award for their organism. The finished product can be a PowerPoint slide or a poster, so it is easy to adapt for your class and your schedule.

This is one reason the activity works so well as both an end of year science activity and a fun high school biology project. It gives students structure, but it also gives them room to be creative.

Why This Works So Well at the End of the Year

By the last week of school, many students are ready for something different. Teachers still want meaningful work, but it helps if that work feels fresh, visual, and hands-on. This activity checks all of those boxes.

Because students are researching unusual organisms and creating their own awards, this activity feels fun and open-ended while still reinforcing science content. It's a great way to keep students engaged, especially at times of the year when traditional lessons are harder to keep going. It also works well when you need something that can fill a few class periods without a lot of prep.

If you teach both middle school and high school students, this project is flexible enough for either level. The topic is accessible, the directions are clear, and students can go deeper or keep things simpler depending on their age and ability level.

Middle school students often enjoy learning about unusual plants and animals and creating a colorful award presentation. High school biology students can take the project a step further by exploring classification, adaptations, ecology, and conservation. Because students choose the organism they want to research, they naturally work at different levels while staying engaged with the same assignment.

What Is Included in This End of Year Science Activity?

This resource includes everything needed to make the project easy to use in your classroom:

  • 20 colorful Mother Nature Award slides featuring unusual plants and animals
  • Two versions of the student worksheet
  • A teacher guide
  • An editable grading rubric

The two student worksheet versions are especially helpful because they give you flexibility. One version guides students through the research and presentation piece, while the second version works well if you want students to focus only on the research. That makes this a strong differentiated biology project for a variety of classroom needs.

The award slides can also stand alone as a quick biology brain break, an Earth Day science activity, or a bulletin board display. After using the slides in class, I love printing and displaying them because students keep going back to read them.

How You Can Use This Biology Activity in Your Classroom

One of my favorite things about this resource is how flexible it is. You can use it in several different ways depending on the time of year and what your students need.

  • End of year biology activity: Use it as a creative research and presentation project during the last week of school.
  • Earth Day science activity: Let students celebrate biodiversity by researching amazing organisms.
  • Beginning of the year icebreaker: The slides are a fun way to hook students early. If you need another creative beginning-of-the-year idea, take a look at my Science Chat first day of school activity.
  • Bulletin board display: Print the award slides and create a colorful life science display that students will keep reading.
  • Extra credit or enrichment: Have students create their own award-winning organism project individually or with partners.

This project also pairs nicely with organism and classification units. If your students are studying how living things are grouped, you might also like this post about teaching classification and taxonomy in a fun way.

Why Students Enjoy This Organism Research Project

Students love this project because they get to choose something weird, surprising, or impressive from the natural world. They are not just filling out a worksheet. They are creating something to share, and that gives the assignment a completely different feel.

There is always a lot of curiosity as students try to find the organism with the strangest trait, the wildest adaptation, or the most unusual survival strategy. That mix of research, creativity, and presentation is what makes this activity feel so different from a typical assignment.

If your students are also preparing for end-of-course testing, you may want to pair this project with a more direct review activity. This biology review post is another strong option for that time of year: biology students love to review with this activity.

A Fun End of Year Biology Project for Middle and High School

If you are looking for an end of year biology activity that is creative, flexible, and easy to implement, the Mother Nature Planet Earth Awards is a great fit. It works as a middle school life science activity, a high school biology project, an Earth Day activity, or a fun research assignment any time of year.

You can see the full resource here: End of Year Science Biology Activity Project on TpT

Every year I'm reminded that students remember activities like this long after they forget a worksheet or lecture. Giving them the opportunity to choose an organism that interests them, research it, and share what they learned creates excitement in the classroom while reinforcing important biology concepts. It is one of my favorite ways to end the school year on a positive note.

Frequently Asked Questions

What is a good end of year biology activity?
If you need an engaging end of year biology activity, a student research project like the Mother Nature Awards is a fun way to keep students learning while giving them creative freedom.

What can students do during the last week of school in biology?
Students can research unusual plants and animals, create their own science award, and present their project to the class.

What is a fun biology project for middle school or high school?
A biology research project that lets students explore amazing organisms and create their own award presentation is a fun option for both middle school and high school.

Biology Review Activities Students Love: Hidden Picture Games

Biology hidden picture review activities in Google Sheets

If you are looking for a biology review activity that is more engaging than a traditional worksheet, these Google Sheets hidden picture games are a fun and effective option for high school biology students. This digital biology review format gives students instant feedback while keeping them actively involved in the review process.

These biology review activities work well for digital review days, stations, bell ringers, early finishers, homework, and test review in high school biology classrooms.

These self-grading review activities are interactive and easy to assign. As students answer questions correctly, part of a hidden picture is revealed. That built in feedback keeps students motivated and helps them immediately recognize when they need to try again.

Try one for free here: Free Metric System Hidden Picture Activity

How do Google Sheets hidden picture activities work?

Students type answers into the sheet. Each correct answer reveals part of a hidden picture. Incorrect answers do not reveal anything, giving students immediate feedback.

Take a quick look at how these hidden picture review activities work in action:

Monohybrid cross hidden picture activity

Why these activities work so well

Instant feedback: Students immediately know if they are correct.

Engaging: Students stay motivated to reveal the image.

Easy to use: Works for bell ringers, review, homework, or stations.

Cellular transport hidden picture activity

Hidden picture activities by topic

Click any topic below to view the activity:

General Science

Genetics

Cell Biology

Molecular Biology

Science Skills

Chemistry


Scientific method hidden picture reveal close up

Frequently Asked Questions About Biology Review Activities

What is a hidden picture review activity?
A hidden picture review activity is a self-checking digital activity where students answer questions to reveal parts of an image. Each correct answer uncovers part of the picture, giving students immediate feedback.

Are these biology review activities self-grading?
Yes. These Google Sheets activities are designed to be self-grading, so students receive instant feedback as they work through the questions.

What topics are covered in these biology review activities?
These activities cover a wide range of topics including genetics, cell biology, DNA and protein synthesis, biochemistry, and general science skills.

How can I use hidden picture activities in my classroom?
They work well as bell ringers, review assignments, homework, stations, or independent practice activities in both digital and traditional classrooms.

Are these activities good for high school biology students?
Yes. These activities are designed specifically for high school biology but can also be used for advanced middle school students.

More biology review activities:

If you are looking for more traditional, hands-on biology review activities, these posts feature classic classroom review games that work well alongside digital hidden picture activities. These options are great for mixing up your review strategies and keeping students engaged in different ways.

Cell Organelles Review
Biology Vocabulary Review
Classification Review

Biology Bell Ringers and Warm Ups

Teaching Cell Structure and Function: 8 Tips for a Great Cell Unit

Tips for teaching cell structure and function with microscope images of cells

Teaching cell structure and function is one of my favorite parts of biology. Cells give us so many opportunities to move beyond memorizing vocabulary and help students see how structures are directly related to the jobs they perform. Microscopes, models, card sorts, lab stations, games, and other hands-on activities can all help make an abstract topic much more concrete.

I get a lot of questions about teaching cell organelles, especially from teachers who feel that their cell unit has become a long list of structures and functions for students to memorize. It doesn't have to feel that way! Whether you are introducing cell theory, prokaryotic and eukaryotic cells, plant and animal cells, organelles, or cell transport, here are eight tips that have worked well for me.

Tip #1: Be Excited About Teaching Cells!

We know that our students are very good at picking up on what we teachers are feeling. If you feel bored teaching your cell unit, there is a good chance your students will feel the same way. I always tried to begin a new unit with something that made students curious about what was coming next.

This short video is one way to kick off a cell unit. It is only about three minutes long, but it can help set the stage for the idea that cells are anything but boring. Be sure to turn up the volume!

Tip #2: Teach Cell Structure and Function Together

There are some basics students simply need to know. Cell theory, prokaryotic and eukaryotic cells, plant and animal cells, and the major cell organelles all provide the foundation for concepts students will encounter throughout biology. But when you begin teaching organelles, try not to let the unit become a list of names and definitions.

Instead, continually connect structure to function. Show students how the two subunits of a ribosome fit together around mRNA during translation. Look at the folded membranes inside mitochondria and ask why all that membrane surface might be useful. Discuss how the structure of the Golgi apparatus allows proteins to enter, be modified, packaged, and sent to other locations.

You don't have to teach every biochemical detail the first time an organelle appears. At this point, students need a strong framework they can build on later.

If you would like a structured way to teach these concepts, my Cell Organelles Structure and Function PowerPoint, Slides, and Notes covers cell theory, prokaryotic and eukaryotic cells, organelles, plant and animal cells, and cellular transport.

After students have been introduced to the organelles, I like to get them actively working with the information. A card sort requires them to make connections instead of simply rereading their notes.

My Cell Organelle Card Sort Game gives students practice connecting organelle names with their structures and functions. Activities like this also make it much easier to see which organelles students are confusing before moving on.

Tip #3: Reintroduce Cell Organelles All Year Long

Students are not going to fully understand every organelle during the first few days of a cell unit, and I don't think we should expect them to. Their understanding of cell structure and function should continue to grow as they move through biology.

For example, students may learn that chloroplasts carry out photosynthesis during the cell unit, but that statement becomes much more meaningful when they actually study photosynthesis. The same thing happens when mitochondria reappear during cellular respiration, ribosomes and the endoplasmic reticulum appear during protein synthesis, and the nucleus and chromosomes take center stage during cell division and genetics.

Cell membranes are another great example. An introductory discussion of the membrane's role in maintaining the cell's internal environment can later develop into a much deeper study of diffusion, osmosis, concentration gradients, and cell transport. My potato osmosis and diffusion lab is one way to make those concepts visible to students.

You can also extend the conversation into homeostasis. In How Do Living Cells Deal With Changes?, I look more closely at how cells maintain a stable internal environment even when conditions around them change.

Tip #4: Get Out Your Microscopes!

Kids love microscope work! If you want to get students excited about your cell unit, give them plenty of opportunities to use microscopes. Diagrams and photographs are useful, but there is no substitute for students looking through the eyepiece and seeing real cells for themselves.

Microscope work also gives students an opportunity to compare different cell types. Instead of simply memorizing a diagram of a plant or animal cell, students can observe differences in shape, organization, and visible structures and begin asking why those differences exist.

My Variation in Cell Structure Lab is designed to let students compare different types of cells while practicing microscope skills.

If your students need more microscope experience, I have two related posts that may help. Microscope Activities for Middle and High School Biology Students Love has ideas for getting students engaged with microscopes, while 7 Reasons Why Microscope Skills Are Important in Biology Class explains why I think these skills are worth making time for in the biology curriculum.

Tip #5: Use Digital Activities to Change the Pace

Digital activities can provide a nice change of pace during a cell unit. There are online resources that allow students to explore cells and organelles visually, and one I've used is Cells Alive!

I also like digital activities that require students to retrieve information rather than simply click through a presentation. My Cell Structure and Organelles Google Hidden Picture Games turn review into a challenge. As students answer questions correctly, portions of a hidden picture are revealed. It gives them a reason to keep working while providing repeated practice with cell concepts.

Tip #6: Make Learning About Cells Hands-On

Like many topics we teach in science, cell structure and function can be rather abstract to students. They can't pick up a mitochondrion or hold a Golgi apparatus in their hands, so anything we can do to get them manipulating information, examining specimens, talking about concepts, and solving problems helps make the content more concrete.

Hands-on learning doesn't always have to mean a traditional lab. Stations can combine models, diagrams, short tasks, observations, and discussion while getting students out of their seats and interacting with the content in several different ways.

My Cell Chat Lab Stations were created for exactly this purpose. Students rotate through stations as they work with cell organelles, plant and animal cells, and cell structure and function. I especially like activities like this because students are talking about biology while they work instead of passively listening to me talk about it.

Tip #7: Make Cell Review Fun!

Let's face it: kids love to play games, especially when there is a little friendly competition involved. As you move through your cell unit, look for ways to mix traditional practice with activities that feel different. Students may be practicing the same vocabulary and concepts, but changing the format can make a big difference in their willingness to participate.

My Biology Buzz Words Cell Organelles and Cellular Transport Vocabulary Games give students multiple ways to work with biology vocabulary. The Google Hidden Picture Games are another option when you want a digital review activity.

The goal isn't simply to make the unit entertaining. Every time students have to retrieve an organelle name, connect a structure with its function, distinguish a prokaryotic cell from a eukaryotic cell, or explain a cell concept in a new context, they are strengthening their understanding.

Tip #8: Build in Plenty of Review and Reinforcement

A cell unit is dense with new vocabulary and concepts. Students may be learning dozens of new terms while also trying to understand how those structures work together to keep a cell alive. One trip through the vocabulary is simply not enough.

I like to build review into the unit rather than save all of it for the day before the test. Short review activities give students repeated exposure to terms and definitions while giving you opportunities to spot misconceptions early.

For a quieter review activity, my Animal and Plant Cells Color by Number combines 50 review and reinforcement questions with a coloring activity. I also have a Cellular Transport Color by Number for additional practice with diffusion, osmosis, and cell transport.

Another option is my Cell Organelles Vocabulary Word Puzzle. And if you want a simple review idea you can put together yourself, take a look at my Cell Organelles Mix and Match Review.

The Best Cell Unit Keeps Making Connections

The most important component of improving your cell structure and function unit is still YOU. Your enthusiasm matters, but so does giving students many different ways to interact with the content. Teach the essential vocabulary, but don't stop at vocabulary. Let students observe real cells, manipulate information, compare cell types, play with the concepts, and continually connect structure to function.

And don't feel as though students have to master everything about cells in one unit. Keep returning to these ideas throughout biology. When students encounter photosynthesis, cellular respiration, protein synthesis, genetics, cell division, and homeostasis, bring the organelles back into the conversation. That's when students begin to see the cell as an interconnected living system rather than a diagram they memorized for a test.

Frequently Asked Questions About Teaching Cells

What should students learn in a cell structure and function unit?

A strong introductory cell unit usually includes cell theory, prokaryotic and eukaryotic cells, major cell organelles and their functions, differences between plant and animal cells, and the relationship between cell structure and function. Depending on your course sequence and grade level, you may also introduce the cell membrane and cellular transport.

How can I make teaching cell organelles more engaging?

Move beyond having students memorize a list of organelles and definitions. Card sorts, microscopes, lab stations, models, vocabulary games, digital activities, and short review challenges give students different ways to work with the same concepts. Most importantly, continually ask students to connect an organelle's structure to the job it performs.

What are some hands-on activities for teaching cells?

Microscope labs are one of my favorite choices because students can observe actual cells and compare different cell types. Card sorts and lab stations are also useful because students physically manipulate information, discuss their thinking, and make connections between cell structures and functions.

How can microscopes be used when teaching cells?

Microscopes allow students to move from textbook diagrams to real biological specimens. Students can compare cell shapes, observe visible structures, practice preparing slides, and see firsthand that cells vary considerably depending on their function and the organism they come from.

How can students remember cell organelles and their functions?

Repeated retrieval is more useful than expecting students to memorize everything at once. Revisit organelles throughout the unit using different formats, and then bring them back again later in the year when students study processes such as photosynthesis, cellular respiration, protein synthesis, cell division, and genetics. Each new connection gives the organelle and its function more meaning.

Teaching Students to Read Science Informational Text


Science surrounds us every single day. From shopping at the grocery store for probiotic yogurts and organically grown produce to news stories on earthquakes, climate change, vaccines, and toxic chemical clouds produced from a train derailment. As a result, it is more important than ever that we teach our science students how to read "science informational text." 

In today’s world, students must be able to read, comprehend, and analyze science informational reading passages!

  • The science students of today will be the decisions-makers of tomorrow. 
  • Students must be able to function in a technical world.
  • It is increasingly important that students be able to discern fact from fiction, and fact from opinion.
  • The reading of "science informational text" helps students develop critical-thinking and problem-solving skills.
  • Reading scientific text can help students develop the language and vocabulary necessary to communicate effectively about scientific topics.
  • Reading and comprehending scientific text is a fundamental skill required for students to score well on college admission tests, such as the ACT.
  • Basic life decisions depend on the ability to read and understand science informational text. For example, "What are the pros and cons of purchasing an electric vehicle?"

The face of science teaching is changing. Common Core Science Standards, as well as the Next Generation Science Standards, are asking teachers to emphasis scientific concepts, rather than the memorization of large amounts of factual data. 

Click any image to view in my TPT store.

For many science teachers, the thought of having to teach students "how to read science" can be overwhelming. However, it's actually a lot easier than you might think. After all, we are already asking our science students to read the textbook, lab handouts, etc. With a few simple tools (Try my Science Reading Task Cards!) and a little planning, you can easily teach your students how to be better readers of science informational passages.

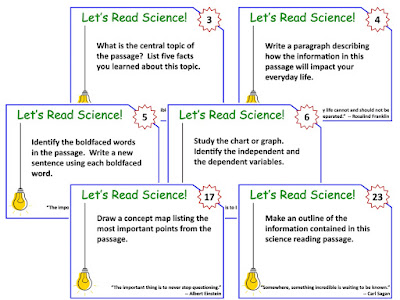
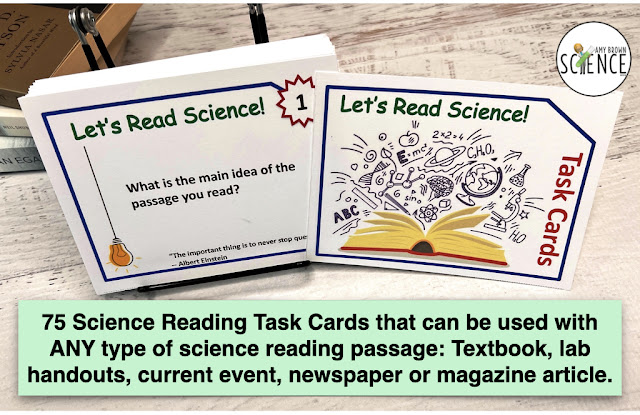
Students need to practice the skill of reading in science. When students are reading, they need to be given prompts on what to look for in the reading. To accomplish this, I developed a set of 75 Science Reading Task Cards that can be used with ANY type of science reading material. These task cards can be used in all science classes and with students in Grades 6 - 12. 


Each task card asks students to pull out specific information from the material they are reading. The task cards focus student attention and help them to determine the main idea, the purpose of an experiment, how to read a chart or graph, or whether the reading passage is based on fact or opinion.

Start by using a reading passage that we science teachers already use every day .... the TEXTBOOK! Ask the students to read a short section from their textbook. Provide 3 to 4 task cards to go along with the reading and ask students to write out answers for each task card question.


Tired of trying to get your students to read the lab handouts before lab day? Ten of the task cards from the set are designed just for this purpose. By answering these ten task card questions, students must read the lab handouts to write a hypothesis, identify variables, and make predictions about the outcome. 

Once your students become familiar with using the task cards while reading their textbook and lab handouts, start adding in an occasional current event article from a newspaper or magazine. You might even work up to assigning a book such as "The Double Helix" or "The Hot Zone."


The set of "Science Reading Task Cards" is available in my TPT store.  Additional information about the task cards includes:

  • The set contains 75 task cards.
  • There are different formats included: (1) Printable and editable version, (2) PowerPoint version to use with your classroom projection system, (3) Google Slides version with included text boxes for students to write in answers, (4) Google Forms version.
  • The cards can be used with any type of science reading material.
  • The cards are appropriate for Grades 6 - 12.
  • PLEASE NOTE:  Science reading passages are NOT included. The teacher must find and choose appropriate reading passages to use.
  • The set includes a detailed Teacher Guide as well as correlation to Common Core (CCSS) Standards.

Looking for ideas on using science graphic organizers in your classroom? Read my blog post about science graphic organizers for reading, writing, and analyzing scientific information.

Looking for a simple way to strengthen science vocabulary? My Biology Prefixes and Suffixes activity helps students decode unfamiliar scientific terms by breaking words into meaningful parts.

Looking for more classroom ideas? Be sure to read my blog post, The Ultimate Guide to Teaching Science Process Skills, where you'll find dozens of teaching strategies, classroom activities, and science resources all in one place.

Periodic Table Review Game


You've just finished teaching the Periodic Table to your chemistry or physical science students. You know you did an awesome job teaching periods, families, the periodic trends of electronegativity, atomic radius, and metallic character. You have no doubt that students know about the alkali metals, the halogens, and the noble gases. You are convinced that all the students will ace the unit test.

Then you notice a few glazed-over looks on the faces of the students. A review of the Periodic Table is needed!

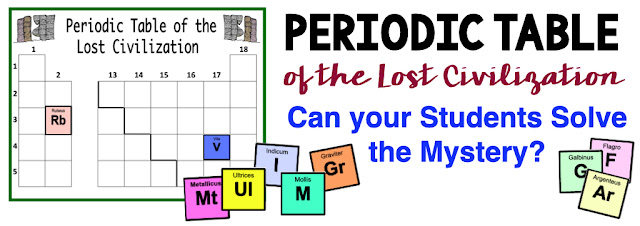
If you really want to know if students understand particular concepts, the ultimate test is to have them apply their knowledge to a new situation.  I give you The Periodic Table of the Lost Civilization.

Click any image or red text to view this resource in my TpT Store.


Here's the Story:
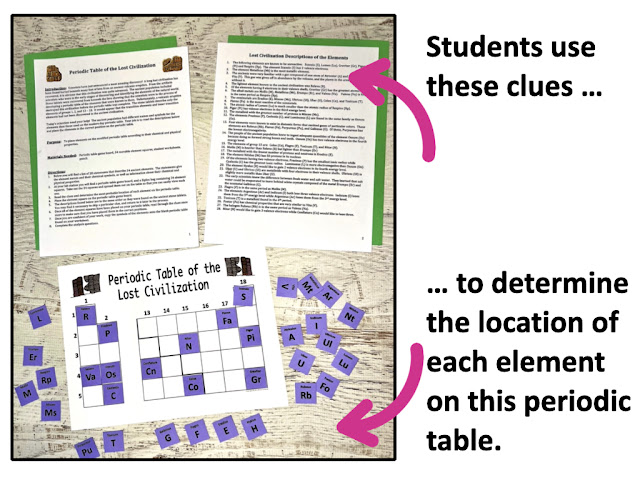
A long lost civilization has been found buried beneath many feet of lava from an ancient volcanic eruption.  The population consisted of many scientists who were in the early stages of discovering and identifying the elements of the natural world. Unfortunately, a volcanic eruption destroyed the civilization before the periodic table was complete. The ancient civilization had different names and symbols for the elements than those used on the modern day periodic table.  Students will read 28 statements that describe 34 elements from long ago. The statements give the element names, symbols, and information about the chemical and physical properties of the elements. Students must decipher the descriptions of the elements and place the elements in the correct position on the periodic table.


Some examples of the clues include:

  • The following elements are known to be unreactive:   Scansio (S), Lumen (Lu), Graviter (Gr), Piger (Pi) and Respiro (Rp).  The element Scansio (S) has 2 valence electrons.
  • Flavus (Fa)  is the most reactive of the nonmetals.
  • The atomic radius of Lumen (Lu) is much smaller than the atomic radius of Respiro (Rp).          
  • Piger (Pi) has valence electrons in the third energy level.

The students will work through the 28 clues and decide where to place the 34 elements on the periodic table of the lost civilization.


As stated above, the ultimate test to determine if students have mastered a concept is to see if they can apply their knowledge to a new situation. If students can arrange the 34 elements on the ancient period table, then they have a really good understanding of how the periodic table works.

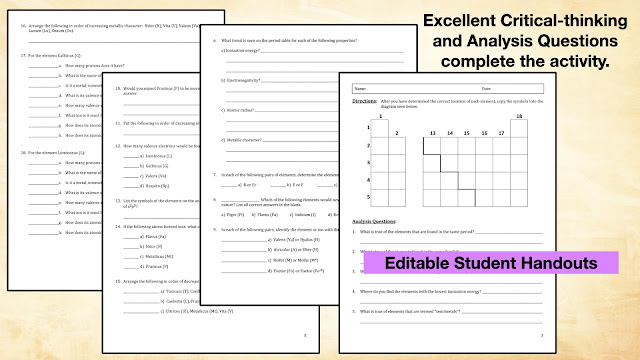
But, since this is a review activity, a 4-Page set of handouts is included with additional critical-thinking and analysis questions.


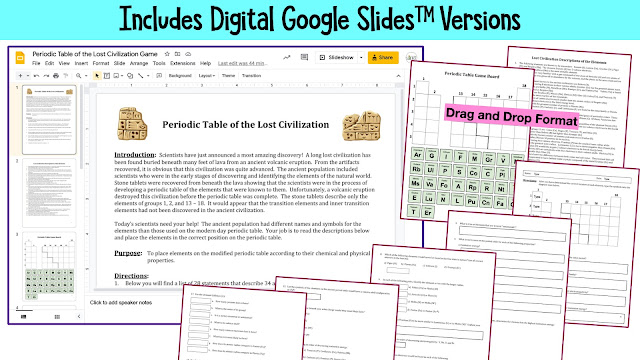
Putting pencil to paper is my preferred method of teaching, but if a digital version is needed, one is included. Students will "drag and drop" the element squares onto the ancient periodic table in Google Slides.


Students will always be more engaged and enthusiastic about reviewing for a test when the review is in a game format. This activity is highly engaging and fun for students. It's a blast to watch the light bulbs go on when students realize they have correctly identified the ancient elements. I hope your students will enjoy this activity as much as mine.


Have fun teaching!