menu Home About Me Home Freebies My Store
Amy Brown Science Facebook    Amy Brown Science Instagram    Amy Brown Science Pinterest    Amy Brown Science Teachers Pay Teachers    Email Amy Brown Science

Search My Blog

Real Science Teaching. Real Classroom Experience.

I’m Amy Brown, a veteran high school biology and chemistry teacher, wife, and mom who understands the daily reality of lesson planning, grading, meetings, and everything in between. I know what it feels like to have too much to do and not enough time to do it.

After decades in the classroom, I’ve created rigorous, classroom-tested biology and chemistry resources that save you planning time while still delivering strong, meaningful science instruction. Every lab, activity, and lesson is designed to move students beyond memorization and into real scientific thinking.

If you want your students excited about science and thinking deeply without spending your entire weekend planning, you’re in the right place.

Amy Brown Biology and Chemistry Teacher

“I just love getting kids hooked on science.”

Showing posts with label biology lab. Show all posts

5 Science Skills Your Students Are Missing (and Easy Ways to Teach Them in Class))

Science skills for students go far beyond following directions in a lab. High school science students need opportunities to design experiments, analyze data, solve problems, and communicate evidence clearly. These science skills help students think like real scientists while building confidence across biology, chemistry, and physical science.

If your students can complete a lab but struggle to explain their thinking, interpret messy results, or design their own investigations, they may need more practice with core science skills. The good news is that you do not need to overhaul your curriculum to build these skills. A few targeted activities can make a big difference.

What science skills should students learn?

Science students need more than content knowledge. They need skills that help them think, analyze, and communicate like real scientists. The most important science skills include:

• Designing experiments
• Interpreting data and graphs
• Writing evidence-based explanations
• Solving quantitative problems
• Communicating scientific ideas

These science skills, often referred to as science process skills, are the difference between students who memorize content and students who truly understand how science works. 

What Are Science Skills?

Science skills are the thinking, reasoning, problem solving, and communication skills students use to investigate questions and make sense of evidence. These include skills such as designing experiments, interpreting graphs, writing evidence based explanations, solving quantitative problems, and communicating scientific ideas clearly.

These are the same kinds of skills students use when they create a hypothesis, identify variables, analyze a data table, explain a trend on a graph, or defend a conclusion with evidence. If you want a broader look at essential science process skills, you may also like my post on 17 essential science skills all students need.

Here are five important science skills for students that will help keep learners engaged, challenged, and growing all year long. These strategies are designed specifically for high school science students but can be adapted for middle school classrooms as well.

1. Designing Original Experiments

Many science students perform traditional labs perfectly but freeze when asked to create their own investigations. They have mastered following directions, but not designing experiments. Learning how to plan an investigation is one of the most important science skills students can develop.

How to challenge them:

  • Let students redesign one of your favorite labs by changing one variable.
  • Have them identify independent, dependent, and controlled variables.
  • Ask students to write their own hypothesis, procedure, and data table.
  • If time allows, add a peer review round before anyone begins the lab.

Students quickly discover that experimental design requires both creativity and critical thinking. If you want more ideas for teaching this skill, you might also like Teach the Skills, Please and applying scientific methods in class.


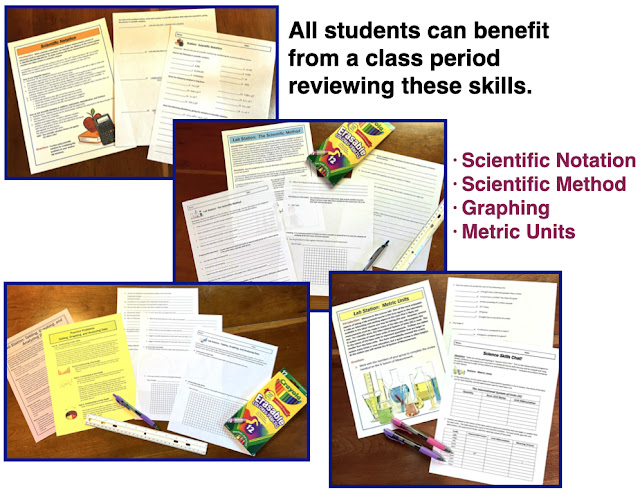
💡 Ready made help: Try my Scientific Method and Experimental Design Lab, a scaffolded activity that walks students through the process of planning their own experiment from scratch. It is editable, printable, and includes a full teacher guide and answer key.

2. Interpreting Complex Data and Graphs

Science students often learn how to make neat graphs, but many still struggle to interpret what the data actually means. They may miss trends, overlook anomalies, or have trouble explaining possible sources of error. Interpreting data is one of the most valuable scientific skills for students because real science is rarely neat and tidy.

How to challenge them:

  • Present messy data sets from real world studies or classroom experiments.
  • Ask students to identify trends, outliers, and possible sources of error.
  • Have them explain what might happen if one variable changed.
  • Encourage students to support their observations with evidence from the graph or table.

This strengthens scientific reasoning and helps students move beyond simply making graphs. For more practice with comparing and interpreting observations, you may also like science skills for comparing and classifying.


💡 Ready made help: My Graphing and Data Analysis Worksheets and Quiz make a great bridge between basic graphing and higher level interpretation. They are fully editable and perfect for differentiating within one class period.

3. Writing Evidence Based Explanations

Even strong students sometimes write weak conclusions. They summarize what happened in the lab, but skip the reasoning behind the results. Writing evidence based explanations helps students connect observations to scientific ideas, which is a skill they will use in every science course.

How to challenge them:

  • Use the CER model, which stands for Claim, Evidence, and Reasoning, to structure student thinking.
  • Show examples of both strong and weak lab conclusions for students to critique.
  • Have students revise a weak paragraph using evidence drawn directly from their data.
  • Ask students to explain not just what happened, but why it happened.

These practices strengthen communication and clarity while helping students think more deeply about the science. Strong scientific writing also supports success in other content areas and on assessments.


💡 Ready made help: My Scientific Writing and Analysis Worksheets help students craft well supported explanations and practice scientific writing step by step.

4. Quantitative Problem Solving

Quantitative problem solving is another key science skill for students. When students use numbers to explain real phenomena, science becomes more meaningful. Whether students are calculating moles, density, percent composition, or changes in mass during osmosis, math helps them see the evidence behind the concept.

How to challenge them:

  • Embed calculations within engaging, real life examples.
  • Ask students to explain in words what each number means.
  • Use examples such as density, percent composition, mole conversions, or membrane transport data.
  • End with a what if question that changes one part of the problem.

If your students need more support with the math side of science, you may also want to read Unlock Success in Science by Mastering Math Skills.


💡 Ready made help: Chemistry teachers can check out my Mole Chat Lab Station Activity. Biology teachers may prefer my Cellular Membrane Transport Lab.

5. Communicating Like a Scientist

Science is not just about getting correct results. Students also need to communicate their ideas clearly and accurately. When students can explain vocabulary, defend a conclusion, present data, and summarize a process for others, they are demonstrating real mastery.

How to challenge them:

  • Have students present lab findings and conclusions to classmates.
  • Use peer review checklists to give structured feedback on clarity and accuracy.
  • Ask students to create an infographic, slide, or visual summary of an investigation.
  • Encourage students to explain scientific vocabulary in language non experts can understand.

Communicating science effectively builds confidence and helps students transfer their learning to other classes and real life situations.

If you want students to strengthen communication while applying science concepts, this is another area where skill based instruction really pays off.

💡 Ready made help: My Evolution Lab, Making Coacervates includes a student designed experiment and opportunities for students to communicate findings in a written lab report or by sharing their experiment orally with classmates.

Final Thoughts

Challenging students in science does not mean assigning more work. It means giving them better opportunities to think, reason, solve problems, and communicate like scientists. Focusing on core science skills helps students succeed not only in science class, but across disciplines.

If you are looking for more ways to strengthen science skills in your classroom, you may also like these related posts:

💡 Ready made help: Explore my Science Skills Mega Bundle filled with labs, notes, quizzes, and digital activities to make skill building seamless and fun.

17 Essential Science Skills All Students Should Master


Do your students ask you questions like these?

  • Which one of these things is the graduated cylinder?
  • How do I convert from decimeters to decameters?
  • I can't do scientific notation on my calculator.
  • What are independent and dependent variables and how do I put them on a graph?
  • You wanted the graph to be on graph paper?
  • I did measure exactly 5 grams of salt on my balance! ( ... with salt in a beaker that wasn't massed.)
  • What do I do next?

Sound familiar? If you teach middle or high school science, these are probably questions you’ve heard a thousand times. And if you’re anything like me, you're always looking for ways to build essential science skills early in the year—so your students are more confident, independent, and lab-ready.

That’s exactly why I created these 17 Essential Science Skills Stations—hands-on, low-prep, and perfect for reinforcing key science lab skills across biology, chemistry, physical science, or general science classes.

🧪 “I used these during the first two weeks of school, and my students were so much more confident during our first full lab! Total game-changer.” – Melissa B., HS Biology Teacher

What are the essential science skills?
In the first days and weeks of a new school year, I need my students to be proficient in the following:
  • Metric measurement
  • Identification of pieces of lab equipment
  • Scientific method
  • Use of basic pieces of lab equipment such as the graduated cylinder, Celsius thermometer, laboratory balance, and metric ruler.
  • Tabling, graphing, and analyzing data.
  • Math skills: Scientific notation, dimensional analysis, significant digits
To accomplish this goal of proficiency of science skills, I have developed Science Skills Chat! -- a set of 17 Lab Stations to address 17 essential science skills all science students should know. I use the word "chat" to emphasize to my students that they are to work together and have a productive discussion at each station in order to maximize their understanding and mastery of the concepts being covered. 

Peer tutoring is a powerful learning tool!


Click on red text or any image to view Science Skills Chat in my TpT store.


What are the 17 Essential Science Skills?
  • Metric Units
  • Identification of Lab Equipment 
  • Scientific Notation
  • Dimensional Analysis
  • Significant Digits
  • The Scientific Method
  • Tabling, Graphing, and Analyzing Data
  • The Graduated Cylinder 
  • The Metric Ruler 
  • The Laboratory Balance 
  • The Celsius Thermometer 
  • The Bunsen Burner 
  • Determining the Volume of Solids 
  • Separating a Mixture 
  • Determining Density 
  • Accuracy, Precision, and Percentage Error
  • Scientific Drawings 


Don't try to complete all 17 lab stations at once. Choose a set of skills (perhaps 4 or 5 lab stations) to be completed during the first week of school. Choose the skills that are of immediate concern to you. Remember, some students may already be proficient in these skills, but other students will be struggling. No matter the ability level, ALL students will benefit from this review and reinforcement. 

Click on red text or any image to view Science Skills Chat in my TpT store.


Once your students have mastered the first set of skills that you deem most important, set up another lab station day to work on skills that students will soon need to know. 

I like the idea of having "Science Skills Friday" where you choose 4 or 5 lab stations to complete. The information in a fewer number of lab stations is not overwhelming, and it is a fun and different way to end the week. There are enough lab stations in Science Skills Chat to create several "Science Skills Friday" sessions.

Click on red text or any image to view Science Skills Chat in my TpT store.


Ten of the lab stations require some sort of lab equipment, but the other 7 skills are perfect activities to leave in your substitute teacher folder. In an emergency, your sub can grab a few of these and create a VERY quality lesson in your absence.

It may seem like you are spending a lot of time at the beginning of the year to cover these 17 science skills, but I guarantee that it is time well spent. As your school year progresses, you will spend far less time repeating and re-teaching skills that your students should already know.  

And, how nice would it be to reduce the number of questions you get every time you go to the lab?


P.S.  I have 11 Chat Lab Station Activities on a variety of topics.  You can view them all here:

👉 If you want a full overview of teaching science skills, read this post on essential science skills. 

Looking for a simple way to strengthen science vocabulary? My Biology Prefixes and Suffixes activity helps students decode unfamiliar scientific terms by breaking words into meaningful parts.


Food Testing Lab for Organic Compounds in High School Biology

A biochemistry lab that tests foods for organic compounds is one of the most effective ways to help students understand macromolecules in a real classroom setting. In this food testing lab, students identify sugars, starches, proteins, lipids, and vitamin C by using common indicator tests such as Benedict’s solution, iodine, Biuret reagent, and indophenol.

If you are looking for a high school biology lab that combines hands on investigation with clear, visual results, this activity helps students connect abstract chemistry concepts to the foods they eat every day while reinforcing your biochemistry curriculum.

Biochemistry lab testing foods for organic compounds showing common foods used to test sugars starches proteins and lipids in high school biology

What Is a Food Testing Lab for Organic Compounds?

This lab is best used during your biochemistry unit when students are learning about carbohydrates, proteins, and lipids. Teaching the characteristics of macromolecules can sometimes feel dry and abstract, so this lab is a great way to break up direct instruction and give students a practical application of the concepts you are teaching.

This lab activity is a two part activity. First, students learn the indicator tests for sugars, starches, proteins, fats, vitamin C, and salt using known solutions. Once students understand how to complete these tests and recognize the results, they test a wide variety of foods to determine which compounds are present.

Tests for Organic Compounds in Food

Before any testing of foods is carried out, students need to practice each indicator test. For example, in order to determine whether milk contains simple sugars, students must first know how to carry out the test for simple sugars and what a positive result looks like. This first part of the lab gives students that practice and helps them interpret their results correctly when they move on to testing foods.

Students learn the positive and negative tests for the following:

  • Students test for starch using iodine.
  • Students test for simple sugars using Benedict's solution.
  • Students test for proteins using Biuret reagent.
  • Students test for lipids using the brown paper test.
  • Students test for the presence of vitamin C using indophenol.
  • Students test for salt using silver nitrate.

Please note: Obviously, salt is not an organic compound. However, it is a fun test for students to carry out, and it provides interesting information about the foods we eat.

Benedicts iodine Biuret and indophenol tests showing color changes for organic compounds in food

Materials Needed for a Food Testing Lab

This lab uses simple materials that are manageable in a classroom setting and easy to prepare ahead of time.

  • Test tubes and test tube racks
  • Glucose solution
  • Starch solution
  • Protein solution
  • Fat or oil
  • Iodine
  • Benedict’s solution
  • Biuret solution
  • Brown paper
  • Hot water bath
  • Vitamin C solution
  • Indophenol
  • NaCl solution
  • Silver nitrate
  • A variety of foods
Biochemistry lab setup for testing foods with Benedicts solution iodine Biuret solution and test tubes

How Students Analyze Results in This Lab

Once students know how to use the indicators, the real fun begins. You can choose a variety of foods for students to test. While you can theoretically use many different foods, some are easier to test than others. Dark purple grape juice, for example, can be frustrating because students may have difficulty seeing the color changes clearly.

I usually get the best results with foods such as milk, yogurt, egg whites, egg yolks, potatoes, celery, cereals, and an assortment of fruit juices. Liquid foods can be used straight from their containers. For solid foods, you will need to prepare a solution using a blender. Students then record observations, identify which compounds are present, and compare results across different foods. This is also a great opportunity for students to organize data tables or write lab reports about their findings.

Why This Biochemistry Lab Works So Well in the Classroom

  • First and foremost, it is just plain fun. When students love your lab activities, they are more excited about your class.
  • This lab reviews and reinforces the concepts you have been teaching. Facts about macromolecules are easier to learn and remember when students see a practical application of the information.
  • This lab teaches good lab techniques, how to organize data, and how to work cooperatively in groups.
  • Students are often surprised to learn that a food they thought was healthy may be mostly sugar and salt.
  • Working through detailed lab procedures teaches students to read, understand, and follow directions carefully.
  • Students use critical thinking and problem solving skills throughout the activity.

More Biochemistry Activities for Your Classroom

If you are planning a full biochemistry unit, these related blog posts can help reinforce key concepts and provide additional hands on experiences for your students:

Organic compounds food testing lab worksheet high school biology data tables and analysis questions

Ready to Use Biochemistry Lab Activity

Above you can see the lab handouts that I use with my students. If you want a complete, ready to use version of this food testing lab with student worksheets, data tables, answer keys, and teacher directions, you can find it in my TpT store.

Click here to view the complete biochemistry lab activity

Frequently Asked Questions About Food Testing Labs

What are the main tests for organic compounds?
Benedict’s test for sugars, iodine for starch, Biuret for protein, and paper or Sudan test for lipids.

What foods work best for this lab?
Milk, yogurt, egg whites, egg yolks, potatoes, cereals, celery, and fruit juices typically produce clear results.

Why do the colors change during testing?
Each indicator reacts chemically with specific molecules, producing visible color changes that signal the presence of those compounds.

Is this lab appropriate for high school biology?
Yes. This lab is ideal for grades 9 to 12 and can be adapted for different ability levels.

Lab Safety Tip: What You Need to Know About the Eyewash Fountain and the Lab Safety Shower


👉👉 Required Reading for the Week:


When was the last time you tested your eye wash fountain and your lab safety shower? Did you know that they are supposed to be flushed once a week according to ANSI standards? I think it is safe to say that the plumbed emergency equipment in our science labs is often neglected. We walk past the eyewash and the shower day after day after day, but rarely stop to inspect it. Since I have never had to pull the handle (thankfully!) on either piece of equipment in an emergency, I rarely stop to think about the routine maintenance that is required.

But I am not an expert. And while I hope this blog post puts a nagging reminder in your brain, use the links in this post to read what the experts have to say. My go-to source of lab safety information is Flinn Scientific. Read this article about the eyewash and safety shower.

Here are the basics about the lab eyewash fountain:
  • The eyewash must provide a flow of water to both eyes simultaneously.
  • The affected area must be irrigated for a minimum of 15 minutes.
  • Keep both eyes open and rotate eyeballs in all directions.
  • Regulation of volume and pressure is required to maintain a soft flow of water to the eyes.
  • Location of the eyewash is important.  Travel time from a work station to the eyewash should be within 10 seconds.
  • Water temperature should be "tepid" which means lukewarm. Acceptable temperature range is 78 - 92 degrees Fahrenheit.
  • Weekly testing should occur to verify flow. This also clears the water line to remove dirt from the pipes.

Here are the basics about the lab safety shower:
  • The shower should provide a deluge large enough to encompass the whole body.
  • Remove contaminated clothing. Every second counts. Don't be modest. It will only slow you down. Remove contaminated clothing!
  • The shower should deliver a pattern of water that is 20 inches across.
  • Water flow should be 20 gallons per minutes at a velocity low enough to not injure the user.
  • The plumbed safety equipment should be clearly marked with signs and by painting the walls and floor surrounding the equipment a bright color.


For us middle or high school teachers, words cannot begin to describe how busy we are during the school day. If your safety equipment does not meet the standards, it is time to have a talk with your school administrator. The safety of your students depends on it!


And please don't forget to take the time to inspect the equipment. No eye wash fountain should ever look like this!


Looking for a place to start in developing your lab safety unit?  These resources are posted in my TpT store:


Good lab safety instruction is essential in providing safe lab experiences for our students.  Good luck!

Lab Safety Tip of the Week #4

Safety Tip #4:
Wear Your Safety Goggles


Required Reading for the Week:  "Wear Your Safety Goggles."  Click red text to view this article.

Accidents happen so quickly. And hindsight is a wonderful thing. In the above article, a science teacher has permanent damage to the eye after conducting a demonstration with no eye protection. And a college student goes in late to their organic chemistry lab, and joins a group of two other students at the fume hood. An explosion occurs in the hood. The student was present in the lab less than two minutes and now has permanent eye damage. It seems so simple after the fact ... Why didn't you have on your safety goggles?
WHERE ARE YOUR
SAFETY GOGGLES!!!!!

As a science teacher, I have to plead guilty. I have often prepped a lab for my students without wearing goggles. But when my students are engaged in lab activities, I am a stickler for the rules. We wear the goggles. Always. No questions asked. But it is always a battle. Students do not like to wear safety goggles, and I am constantly having to tell students to put their goggles back on. Unfortunately, most of us are having to carry 30 (and sometimes more!) students into the lab. As soon as you tell one student to put their goggles back on, another student across the room has taken theirs off! Sound familiar?

You, as the instructor, have to be persistent and consistent. Establish the rule of wearing safety goggles. Do not deviate from this rule (EVER!), and have consequences for those who do not obey the rules. Have a conversation with your school administration about lab safety to establish a plan of action for those students who fail to follow the rules. You want to make sure that you have "back up" from admin in case consequences to the student need to be doled out.

Let's move away from student behavior, and on to the goggles themselves. What kind should you use? Are all goggles the same?

All goggles are not the same! And even though many types of goggles might meet regulations and guidelines and be approved for our school labs, some of them are not the best choices for our students. In my opinion, eye protection should have a complete and snug fit around the eye, and be held to the face by a strap that goes around the back of the head. Yes, the students hate these types of goggles, but it is a battle worth fighting.  Here is an excellent article from Flinn Scientific about regulations and standards of safety goggles.


Next topic:  The storage and sanitation of goggles.  I took this picture a few years ago while visiting in a neighboring high school. If you are going to use one classroom set of goggles, and students will be sharing goggles with other students, please take great care in the sanitation of goggles. This picture shows a great goggles sterilizer, but it was not being used correctly. Goggles were not placed in individual slots. They were haphazardly thrown in the cabinet. The inside of the sterilizer was dirty, and it was obvious the goggles had never been washed. Here is an excellent video on the use of the goggles sterilizer. If at all possible, I highly recommend that each student have their own pair of goggles that are not shared with another student.


In summary, 
  • Students must wear goggles and this is not negotiable!
  • Make sure you purchase eye protection that meets the safety standards.
  • Practice what you preach!  The instructor needs to be be the role model in laboratory safety.
Looking for a place to start?  These resources are posted in my TpT store:


Good lab safety instruction is essential in providing safe lab experiences for our students.  Good luck!


Microscope Activities for Middle and High School Biology Students Love

Microscope activities for middle school and high school biology are one of the easiest ways to get students excited about lab and hands-on learning. Students love using microscopes because they get to explore real specimens, see cells up close, and experience the excitement of discovery in a hands-on way.

The microscope is one of the most important basic tools of biology. It opens the door to cell structure, observation skills, lab techniques, and scientific curiosity. Best of all, when students get excited in the lab early on, that engagement pays off all year long.

Why Students Love Using Microscopes

There is something about microscopes that immediately draws students in. Even on days when energy is high and focus is low, students settle in quickly and become curious about what they are seeing. There is something powerful about letting students look at real specimens for themselves. Instead of just hearing about cells in a lecture, they get to observe them, compare them, and talk about what they see.

That excitement matters. The microscope is not just a piece of lab equipment. It is one of the foundational tools of biology. When students feel successful with microscopes, they build confidence with observation, slide preparation, staining, comparing structures, and drawing conclusions from evidence. That kind of engagement pays off long after the microscope lab is over.

If you want to build strong microscope skills first, you may also like my post on mastering the compound microscope.

Fun Microscope Activities for Middle and High School

One reason microscope activities work so well is that they combine structure with discovery. Students can compare plant cells and animal cells, observe chloroplasts in Elodea, look at chromoplasts in apple or tomato skin, examine starch grains in potato cells, and have a great time exploring pond water. These are the kinds of microscope labs that students remember because they are seeing everyday items in a new way under the microscope.

If you are looking for fun things to do with microscopes, start with activities that let students see a wide variety of specimens. When students notice differences for themselves, biology becomes much more concrete and much more interesting.

Microscope Lab Stations for Engagement and Review

Sometimes you need a microscope activity that adds movement and collaboration to the lesson. That is exactly where lab stations fit in so well. If your students already love using microscopes, stations are a great way to keep that energy going while reinforcing important skills and concepts.

My Microscope Chat Lab Stations gives students the chance to rotate, discuss, and work through a variety of microscope-related tasks in an active format. This is a great option when you want high engagement without losing the academic focus of the lesson.

Microscope lab stations activity with student worksheets and collaborative biology tasks

Take It Further with Cell Structure and Staining

After students have had the chance to explore a variety of specimens, it is a natural next step to guide them into deeper analysis. This is where labs focused on cell structure, organelles, and staining techniques become especially valuable.

My Diversity of Cell Structure and Cell Organelles Lab helps students take that next step with real specimens and staining.

Cell structure lab using microscope slides and staining to observe plant animal and protist cells

Let Students Explore a Variety of Cells

Once students are comfortable using microscopes, giving them access to a wider variety of specimens is where things really get exciting.

My Variation in Cell Structure and Cell Organelles Lab helps students explore many different specimens and build confidence.

Biology lab exploring plant and animal cells using microscopes with pond water and real specimens

Why Starting with Microscopes Pays Off All Year

Microscope labs do much more than fill a day. They set the tone for the year. When students begin with an engaging lab, they see biology as something they can do, not just memorize.

Sometimes the simple things really do work best.

More Biology Activities and Teaching Tips

👉 If you are teaching microscope skills, you can read more about why they are important here: 7 Reasons Why Microscope Skills are Important Science Skills.

Osmosis Lab and Diffusion Lab Experiment for Biology

A Simple Osmosis and Diffusion Lab That Makes Cellular Transport Click with Biology Students

Teaching cellular transport in biology can sometimes feel like throwing vocabulary words at a wall. Terms like diffusion, osmosis, active transport, passive transport, hypotonic, hypertonic are often intimidating for our students. If you are looking for a simple, visual, and memorable diffusion and osmosis lab that brings these concepts to life, this lab is for you.

This hands-on osmosis and diffusion lab uses dialysis tubing to help students visualize passive transport through a semipermeable membrane. It is easy to set up, produces clear results, and helps students understand molecular size and membrane permeability without the need for specialized lab equipment.

If you are looking for another way to teach osmosis using simple classroom materials, you may also want to try this potato osmosis lab experiment where students measure mass changes in potato cores placed in different solutions.

The Setup for This Osmosis and Diffusion Lab: Two Bags, Two Solutions, One Powerful Lesson

Students are given two pieces of dialysis tubing. One piece of tubing is filled with starch solution, the other with glucose solution. Each is placed in a separate cup of tap water. To the cup containing the starch-filled bag, students add iodine.

The visual results start almost immediately. Within minutes, students see the dialysis tubing turning purple or bluish black, a dramatic visual change that signals diffusion is taking place. The students can see that the iodine molecules move across a semipermeable membrane and react with the starch. Meanwhile, students use glucose test strips to check whether glucose molecules have diffused out into the water of the second cup.

What Students Learn from This Osmosis and Diffusion Lab

By analyzing their results, students make key observations:

  • Starch did not leave the bag.
  • Iodine entered the bag.
  • Glucose slowly diffused out, with positive test strip results appearing only after 24 hours.
  • Water moved into the bag, as shown by swelling.

These outcomes open the door for class discussions about molecular size, permeability, and the differences between active and passive transport. I also challenge students to rank the molecules from smallest to largest based on which ones could pass through the membrane.

Ready to Try This Osmosis and Diffusion Lab?

The version of the lab I use in my classroom is available here:

👉 Diffusion Through a Non-Living Membrane

It comes with student instructions, a detailed teacher guide, data tables, and analysis questions ... everything you need for a smooth, engaging class period.

Want to go further? Try this FREE download:

🎁 The Effect of Concentration on the Rate of Diffusion This is a great follow-up or extension that deepens students' understanding of how concentration gradients affect the rate of diffusion.

More Resources to Reinforce Cellular Transport

Need additional reinforcement activities for your cell transport unit? These are teacher favorites in my TPT store:

Why This Osmosis and Diffusion Lab Works

This osmosis and diffusion lab works because it is:

  • Simple to prep
  • Visually powerful
  • Aligned with NGSS and common biology standards
  • Appropriate for high school biology
  • Engaging enough that students remember the results

Whether you're introducing the topic for the first time or reviewing before an exam, this lab creates the kind of “aha!” moment every biology teacher hopes for. Good luck and happy teaching!

Population Ecology Lab: Estimating Population Size Using Mark and Recapture Method

If you are looking for a population ecology lab that works in a real classroom, this mark and recapture lab is a simple and effective way for students to learn how scientists estimate population size. This hands-on biology lab gives students meaningful practice with population estimation, data collection, and analysis without requiring outdoor space or complicated setup.

This population ecology lab is easy to set up, easy to clean up, and uses simple materials like beans and a paper bag. Students use the mark and recapture method to collect data, calculate population size, determine percent error, and analyze real limitations of sampling. It is an easy way to give students a true population estimation experience without the logistical challenges of an outdoor lab.

👉 See everything included in this population ecology lab and how it works in your classroom

This lab includes student worksheets, data tables, and a complete teacher guide, so it is ready to use in your classroom right away.

Why Scientists Estimate Population Size

In order to effectively study living organisms, scientists often need to know the size of a given population. A population is a group of organisms of the same species that live in the same general area. Wildlife biologists may worry that a population is outgrowing the environment’s ability to support it, or that a population is becoming too rare.

It is not reasonable to count every organism in a population. Organisms hide, move, and spread out across environments, which is why scientists rely on sampling methods such as the mark and recapture method.

What Is the Mark and Recapture Method?

The mark and recapture method is a sampling technique used in population ecology to estimate population size. Scientists capture a sample, mark them, release them, and later capture a second sample. The ratio of marked to unmarked individuals allows scientists to estimate the total population.

How This Population Ecology Lab Works

This population ecology lab uses simple materials: white beans, red kidney beans, a brown paper bag, and a cup or beaker.

The white beans represent the population. Students perform an initial capture, mark the sample, and return it to the population.

mark and recapture lab classroom setup red beans white beans population estimation activity

Instead of marking each bean, students replace captured white beans with red beans. This represents organisms that were captured and marked. This makes the activity easy to manage while still giving students an authentic population ecology lab experience.

Students then complete a second capture and use their data to estimate population size. They compare their estimate to the actual population and calculate percent error.

population ecology lab worksheet data table estimating population size mark and recapture

Why Teachers Love This Lab

This population ecology lab is one of those activities that is easy to use and consistently produces strong results. It requires minimal prep, uses inexpensive materials, and works well in a regular classroom setting without the need for outdoor space.

Students stay engaged because they are actively collecting data and solving a real problem, and the percent error calculation helps them evaluate how accurate their results are. This makes it a great combination of biology content, math skills, and critical thinking.

Why This Lab Works So Well

This population ecology lab combines content and skills and works well as a high school biology lab for teaching population estimation and the mark and recapture method. Students collect data, perform calculations, determine percent error, and answer analysis questions that require critical thinking.

It is also extremely easy to set up and clean up, making it ideal for busy classrooms.

What Students Learn in This Population Ecology Lab

  • estimating population size
  • mark and recapture method
  • data analysis
  • percent error

A Great Indoor Ecology Lab Option

This activity allows students to model population sampling and estimating population size without needing outdoor access. It is a strong alternative to outdoor labs.

If you want to compare indoor and outdoor labs, check out this post on outdoor science labs.

Get the Lab

👉 See everything included in this population ecology lab and how it works in your classroom

More Ecology Activities for Your Classroom

Check out these ecology related blog posts:

Transpiration Lab for High School Biology: Simple Plant Transpiration Experiment


Plant transpiration can be a challenging concept for high school biology students, especially when it is only taught through notes or diagrams. This simple plant transpiration lab helps students understand what plant transpiration is by observing water loss in leaves through an easy, hands-on classroom experiment. Designed for high school biology courses, this transpiration lab makes plant water movement visible, measurable, and meaningful.

I often find that my students are woefully lacking in their knowledge of plants. When time runs short at the end of the school year, plant units are usually the first to be cut. Because I enjoy teaching plants, I make it a priority to leave time each year for a plant unit.

This version of a plant transpiration experiment is incredibly easy to set up, clean up, and take down. It uses a simple materials list and includes all the components I want in a lab activity, including data collection, graphing, critical thinking, problem solving, data analysis, and drawing conclusions. Plus, it is fun, and students always enjoy doing it.

TL;DR and want to see the activity in my TpT store? Click here.

What is Plant Transpiration?

Plant transpiration is the loss of water vapor from a plant through the leaves. As the stomata open to allow carbon dioxide to enter the leaf for photosynthesis, water vapor escapes the leaf and enters the atmosphere.

For trees and other tall plants, moving water from the roots to the top of the plant is a challenge. The major force in water transport is provided by the evaporation of water from the leaves during transpiration. As water is lost, the movement of water out of the leaf pulls water upward through the xylem all the way down to the roots. This process is known as transpiration pull.

Traditional Plant Transpiration Lab Using a Potometer

Traditional potometer setup showing plant stem and tubing used to measure water loss during a transpiration lab.

Traditionally, biology teachers used potometers to measure water loss from leaves during transpiration. Does this image bring back memories of a failed lab? Potometers are notoriously difficult to set up because it is hard to create a tight seal around the plant stem and rubber tubing. Without a good seal, results are unreliable, and students often crush the delicate stem during setup.


Simple plant transpiration experiment setup with bedding plants in beakers sealed with plastic bags to measure leaf water loss

Transpiration Lab for AP Biology and High School Biology

This simple plant transpiration lab is easy to set up, clean up, and take down, making it ideal for high school biology classrooms. Go to your local nursery or Walmart and buy some small bedding plants. I like to use begonia plants. The begonia is a good choice because it has a thick and fleshy leaf. 


Place the plants in small (250 mL) beakers. Water them thoroughly. In this experiment, you want to measure the amount of water lost from the leaves, so you have to ensure that no evaporation occurs from the soil in the beaker. Place a plastic sandwich bag around the beaker and wrap it very tightly around the stem of the plant. A bit of tape may be needed to keep the sandwich bag wrapped tightly around the stem. Only the leaf should be sticking out of the plastic bag.

The only way water is getting out of this beaker is through the leaves of this plant!

Determine the amount of water lost from the leaves by massing the entire setup. Be sure to get an initial mass before the experiment begins. In the photo shown, the initial mass was 195.57 grams.

Testable Variables in a Plant Transpiration Experiment


Now for the testable variables. What factors will cause an increase or decrease in the rate of transpiration? This lab will test 3 different environmental factors.
  • One plant will be placed in continuous light for 24 hours. 
  • One plant will be placed in front of a blowing fan for 24 hours.
  • One plant will be placed inside a plastic bag that has been spritzed with water to create high humidity.
  • The fourth plant will serve as a control.
Simple plant transpiration experiment setup showing experimental factors being tested: strong light, wind, and humidity.

Every experiment needs a control. In this transpiration lab, the control plant is not exposed to any experimental environmental factors. While the control plant is still transpiring, it does so under normal conditions, allowing students to compare results accurately.

Allow the plants to sit for 24 hours. After this time period, each plant is massed again. Students are often amazed at how much water has been lost through the leaves. All final masses should be compared to the control to determine whether the environmental factor tested caused an increase or decrease in the rate of transpiration.

There are also some uncontrolled variables in this experiment. The plants are not identical, and each has a different total leaf surface area, which can affect transpiration rates. Even so, students collect clear data showing the effects of environmental conditions on plant transpiration.

Adapting the Transpiration Lab for Different Grade Levels


Elementary: At the elementary level, it may be enough to demonstrate that water is absorbed by roots and released through leaves. Students can make predictions, form hypotheses, and practice steps of the scientific method.

Middle Grades: Middle school students can calculate the rate of water loss per minute, test additional variables such as darkness or temperature, or compare transpiration rates among different plant species.

High School Biology and AP Biology: 
High school students can remove leaves to calculate surface area and determine water loss per unit area. Students may also research mechanisms of transpiration such as cohesion, adhesion, capillary action, and transpiration pull.

After the experiment, I take the plants home and place them in my flower beds.

For additional plant kingdom resources, consider short video segments from The Private Life of Plants by David Attenborough. Many clips are available on YouTube and are typically three to five minutes long. Students always enjoy them.

Frequently Asked Questions About Plant Transpiration Labs

What is plant transpiration?
Plant transpiration is the process by which water moves from a plant’s roots, through the stem, and out of the leaves as water vapor. This water loss helps regulate temperature and supports the movement of water and nutrients throughout the plant.

What is a simple plant transpiration experiment for high school biology?
A simple plant transpiration experiment uses a live plant placed in a sealed container so that water loss occurs only through the leaves. By measuring mass before and after the experiment, students can observe and quantify transpiration.

How does this transpiration lab work for AP Biology?
This transpiration lab works well for AP Biology by allowing students to analyze variables such as light, humidity, air movement, and leaf surface area. Students can collect quantitative data, graph results, and connect observations to concepts like transpiration pull and water potential.

Why is a control important in a transpiration lab?
A control plant provides a baseline for comparison. By comparing experimental plants to a control, students can determine whether specific environmental factors increase or decrease the rate of transpiration.