menu   Home About Me Home freebies My Store  
 photo 3am_AB_f1_zps652b0c0f.png    photo 3am_ab_gplus_zps3ab6fefc.png    photo 3am_ab_pin_zpsbfebd6d2.png    photo 3am_tpt1_zpse91e0740.png   photo 3am_ab_email1_zpsebc98a17.png

Search My Blog

Showing posts with label labs. Show all posts

17 Essential Science Skills All Students Should Master


Do your students ask you questions like these?

  • Which one of these things is the graduated cylinder?
  • How do I convert from decimeters to decameters?
  • I can't do scientific notation on my calculator.
  • What are independent and dependent variables and how do I put them on a graph?
  • You wanted the graph to be on graph paper?
  • I did measure exactly 5 grams of salt on my balance! ( ... with salt in a beaker that wasn't massed.)
  • What do I do next?

Sound familiar? If you teach middle or high school science, these are probably questions you’ve heard a thousand times. And if you’re anything like me, you're always looking for ways to build essential science skills early in the year—so your students are more confident, independent, and lab-ready.

That’s exactly why I created these 17 Essential Science Skills Stations—hands-on, low-prep, and perfect for reinforcing key science lab skills across biology, chemistry, physical science, or general science classes.

🧪 “I used these during the first two weeks of school, and my students were so much more confident during our first full lab! Total game-changer.” – Melissa B., HS Biology Teacher

What are the essential science skills?
In the first days and weeks of a new school year, I need my students to be proficient in the following:
  • Metric measurement
  • Identification of pieces of lab equipment
  • Scientific method
  • Use of basic pieces of lab equipment such as the graduated cylinder, Celsius thermometer, laboratory balance, and metric ruler.
  • Tabling, graphing, and analyzing data.
  • Math skills: Scientific notation, dimensional analysis, significant digits
To accomplish this goal of proficiency of science skills, I have developed Science Skills Chat! -- a set of 17 Lab Stations to address 17 essential science skills all science students should know. I use the word "chat" to emphasize to my students that they are to work together and have a productive discussion at each station in order to maximize their understanding and mastery of the concepts being covered. 

Peer tutoring is a powerful learning tool!
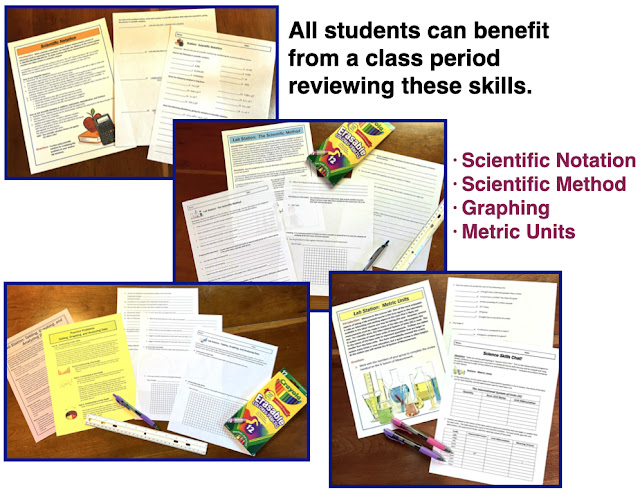

Click on red text or any image to view Science Skills Chat in my TpT store.


What are the 17 Essential Science Skills?
  • Metric Units
  • Identification of Lab Equipment 
  • Scientific Notation
  • Dimensional Analysis
  • Significant Digits
  • The Scientific Method
  • Tabling, Graphing, and Analyzing Data
  • The Graduated Cylinder 
  • The Metric Ruler 
  • The Laboratory Balance 
  • The Celsius Thermometer 
  • The Bunsen Burner 
  • Determining the Volume of Solids 
  • Separating a Mixture 
  • Determining Density 
  • Accuracy, Precision, and Percentage Error
  • Scientific Drawings 


Don't try to complete all 17 lab stations at once. Choose a set of skills (perhaps 4 or 5 lab stations) to be completed during the first week of school. Choose the skills that are of immediate concern to you. Remember, some students may already be proficient in these skills, but other students will be struggling. No matter the ability level, ALL students will benefit from this review and reinforcement. 

Click on red text or any image to view Science Skills Chat in my TpT store.


Once your students have mastered the first set of skills that you deem most important, set up another lab station day to work on skills that students will soon need to know. 

I like the idea of having "Science Skills Friday" where you choose 4 or 5 lab stations to complete. The information in a fewer number of lab stations is not overwhelming, and it is a fun and different way to end the week. There are enough lab stations in Science Skills Chat to create several "Science Skills Friday" sessions.

Click on red text or any image to view Science Skills Chat in my TpT store.


Ten of the lab stations require some sort of lab equipment, but the other 7 skills are perfect activities to leave in your substitute teacher folder. In an emergency, your sub can grab a few of these and create a VERY quality lesson in your absence.

It may seem like you are spending a lot of time at the beginning of the year to cover these 17 science skills, but I guarantee that it is time well spent. As your school year progresses, you will spend far less time repeating and re-teaching skills that your students should already know.  

And, how nice would it be to reduce the number of questions you get every time you go to the lab?


P.S.  I have 11 Chat Lab Station Activities on a variety of topics.  You can view them all here:


Population Genetics: The Hardy Weinberg Equation


This fun lab simulation should guarantee that your students understand the Hardy Weinberg Principle!  

I talk to a lot of biology teachers. Everyday. Some are in my school, some are at other schools in my district, others I know "virtually" from various message boards that I read and post to.  Through these communications, I have come to realize that many biology teachers do not include the Hardy-Weinberg Principle in their lesson planning.

I know that all biology teachers have their own "order of events" but for me a unit on genetics, followed by my unit on evolution is perfect.  In fact, I would be hard pressed to do it any other way.  The Hardy-Weinberg Principle is the link between genetics and evolution.  It is the proof that we offer to our students that populations are constantly changing and evolving.  It allows us to mathematically show that the frequency of a particular allele in a population can change over time.

Simply put:  Evolution is any change in the frequency of alleles in a population.  Evolution is the result of changes in the gene pool.  Two men, G. H. Hardy and W. Weinberg, proposed a mathematical model for detecting changes in the gene pool.


The Hardy-Weinberg Principle states:  “In the absence of mutation, migration, and natural selection, and in a population that is sufficiently large, the frequencies of alleles will remain the same.”  

The Hardy-Weinberg Principle is represented in the equation:


No population is free of these agents of change.  The Hardy-Weinberg equation is used to detect changes in the population from one generation to the next.  Since no population in nature is free of mutations, migrations, and natural selection, and since mating is rarely completely random in nature, of what value is the Hardy Weinberg Principle?  It allows us to detect changes in the gene pool, and therefore, determine that a population is in a state of change....Evolution!

My experience with my own students is that some of them have a little trouble grasping this concept. After introducing the topic and working through quite a few practice problems, I do a simulation lab.

Purpose of the Lab:  
1.  To simulate how changes in the gene pool might occur by using the class as a breeding population of individuals. 
2.  To observe how the Hardy-Weinberg equation is used to detect changes in allele frequencies in a population.

Materials:   PTC test papers,  Calculator,  Allele cards,  Coins, Pencil and paper

Safety Precautions:   None

The student handouts for this lab are numerous.....12 pages!  I usually run off a class set and have students record all of their information on notebook paper. I use the class set throughout the day, and then I file them away for use the next year.

I have also included an 11-page teacher guide.  The teacher guide has tips and tricks for making the lab successful as well as answers to questions and solutions to problems.  Sample data is included to give you an idea of what to expect in the simulation.

Students begin the lab by determining the frequency of an allele in the class population.  I like to use PTC paper to determine if students are tasters or nontasters. But if PTC paper is not available, you can choose another trait such as the presence or absence of dimples, or the ability to roll the tongue.  From the number of recessive individuals in your class, the value of q can be determined.  From that point, the students will determine what percentage of the class is homozygous dominant and heterozygous for the given trait.


Next, students will run three simulations:  (1) Testing the Hardy-Weinberg Principle, (2) Testing the Hardy-Weinberg for Selection Pressure, and (3) The Heterozygote Advantage.

Students will begin the simulation as heterozygous individuals and will use allele cards to generate offspring. Students proceed through several generations of "mating" and the data is used to test the different conditions of the Hardy-Weinberg Principle.

During each simulation, students will determine the frequency of the dominant and recessive allele and note how the frequency of p and q change in various scenarios. The lab concludes with follow up questions and 8 additional practice problems involving the Hardy-Weinberg equation.  

The end result?  My students have mastered the concept and are able to work problems involving the Hardy-Weinberg equation.

Good luck, and have fun teaching!


Everything About Enzymes!! (and a free lab!)


Recently, I was required to attend a system-wide inservice meeting for all the science teachers in our district.  In attendance were science teachers of grades 7 through 12.  These events are fun and interesting, mostly because I have been teaching for 28 years, and it is nice to see science teachers from other schools that I have known for years, but rarely get to see.  After joining up with a group of old acquaintances, the inevitable question came up:  "What have you been doing in your biology classes?"

I responded with, "I have just finished teaching a unit on enzymes to our biology 1 students."  One of the other teachers immediately responded with, "I don't really teach that in my class."

What????  How do you NOT teach about enzymes in a biology class????  As soon as I returned home that day, I promptly sent her all of my teaching materials on enzymes.

Enzymes are the stuff of life.  No cell would be alive without the action of enzymes.  Life in a cell is made possible through the hundreds of chemical reactions that occur there.  If these chemical reactions proceed too slowly, the activities of the cell would come to a screeching halt.  You see, enzymes are biological catalysts. They speed up the chemical reactions of the cell.  Without these enzymes, the reactions of the cell would proceed so slowly that they would be of no use to the cell, and the cell would die.

When is the best time to teach about enzymes?  I begin teaching about enzymes when I teach biochemistry.  When teaching about carbohydrates, lipids, and proteins, it is a natural fit to talk about enzymes as you discuss the structure and functioning of proteins.  I also teach about enzymes when I cover photosynthesis, respiration, replication, transcription, digestion..... This list could go on and on since enzymes are involved in every single biological process!

Be sure to cover all the basic points about enzymes:
  • Enzymes are biological catalysts that speed up the chemical reactions of the cell.
  • Enzymes are proteins.
  • Enzymatic reactions occur faster and at lower temperatures because enzymes lower the activation energy for that chemical reaction.
  • Enzymes are never consumed or used up during the reaction. They can do their job over and over again.
  • Enzymes are highly specific for just one substrate.  The enzyme has an active site with a unique 3-D shape into which this substrate must fit.  
  • Enzymes catalyze both the forward and the reverse of the same reaction.
  • Enzymes can be denatured by temperatures and pH levels outside the optimal range for that particular enzyme.
Enzymes are truly amazing proteins that play a vital role inside every living cell.  Please don't leave this out of your curriculum!

Okay.... I did promise you a freebie.  This is a lab that I have done for years, and it remains a favorite with my students year after year.

The Effect of the Enzyme Amylase on Starch


This is a fun lab that students enjoy and it teaches important concepts about enzymes.

Make your biology class more appealing and exciting by incorporating a variety of fun and interesting labs into your weekly lesson plans.  This inquiry-based lab allows students to discover basic information about the functioning of enzymes within cells.  Enzymes are biological catalysts that speed up the chemical reactions within cells.  Without the aid of enzymes, the chemical reactions of the body would proceed so slow that the reaction would be of no use to the cell.

Purpose:  In this lab, the student will observe the effect of the enzyme amylase on its substrate, starch.  The student will perform various experiments with the enzyme amylase and will compile a list of facts concerning enzymes.

Students are given the task of trying to determine what happens to starch in the presence of the enzyme amylase.  There are essentially four mini-experiments in the lab that will lead the student to the appropriate conclusion.


  1. The student mixes together a solution of of amylase and starch and determines the length of time it will take until the starch has been completely broken down into end products.  This is done by removing a drop of the solution each minute and testing it for the presence of starch.
  2. Now the student must determine the end products of the reaction.  Benedict's solution is used in this second portion of the lab to determine that the end product is a simple sugar.
  3. In the third portion of the experiment, students use glucose test strips to determine that glucose is NOT one of the end products.
  4. Finally, the student will test the solution for the presence of proteins to determine that the enzyme is still present when the reaction is complete.


This lab is designed for a typical high school biology class for students in grades 9 – 12.  It is appropriate for both standard and honors classes as well as for first or second year biology students.  I have used this lab in both my freshman biology I class as well as my AP biology class.


Happy Teaching!

Lab: Gas Exchange in Respiration


Gas Exchange in Respiration:
Qualitative Observation of Carbon Dioxide Release

It is the time of year for teaching photosynthesis and respiration to my biology students.  I think that all biology teachers will agree that these are difficult concepts to teach to our students.  Other than genetics, I think that the topics of photosynthesis and respiration may be my favorite topics to teach.  I enjoy the chemistry aspects, and I especially enjoy sitting back and marveling at how beautiful these two processes are.  I really get excited in my classroom and can often be heard saying, "Isn't it cool how this works?!"

Which do you teach first?  Personally, I like to teach respiration first.  After 28 years of teaching, I find that this approach works best for me.  I have tried it both ways, and now I always start with respiration.

It is so important to make sure that the students first have a firm grasp on the "big picture".  Emphasize the reactants and the products.  Make sure the students understand what the end result will be.  Then start adding in the details of the chemical reactions.  Once the student has a basic understanding of the relationship between these two processes, you can begin to add the details just like hanging ornaments on a Christmas tree.  As I move into the more complicated aspects of these chemical reactions, my students become more and more excited.  They quickly realize that they can really "see" the chemistry that is taking place.  

Unfortunately, I have found it very difficult to find good labs to reinforce the concepts of respiration.  I find photosynthesis labs to be more more effective.  At any rate, today I did this lab with my students:  Gas Exchange in Respiration.  The basic idea is to show students that living organisms give off carbon dioxide.  In the test tubes shown in the picture above, a small amount of phenol red has been added to each tube.  Glass beads are added to provide a barrier between the phenol red and the specimens that will be added to each tube.  As you look at the picture, the tube to the far left contains a piece of paper toweling that was dipped in a boiled yeast solution.  Tube 2 has paper toweling that was dipped into a fresh yeast solution.  Tube three contains 5-10 germinated seeds.  Tube four contains 5-10 dry seeds.  And tube 5 contains only the phenol red and no additional materials.  If the organism gives off carbon dioxide it will cause the phenol red to change from red to orange or yellow.  The tubes containing boiled yeasts and dry seeds will not show any change in the phenol red.  Fresh yeast and germinated seeds are actively respiring and will quickly cause a color change in the phenol red.

If you have great lab ideas for respiration, I would love to hear them!  Happy Teaching!