menu   Home About Me Home freebies My Store  
 photo 3am_AB_f1_zps652b0c0f.png    photo 3am_ab_gplus_zps3ab6fefc.png    photo 3am_ab_pin_zpsbfebd6d2.png    photo 3am_tpt1_zpse91e0740.png   photo 3am_ab_email1_zpsebc98a17.png

Search My Blog

Showing posts with label lab. Show all posts

17 Essential Science Skills All Students Should Master


Do your students ask you questions like these?

  • Which one of these things is the graduated cylinder?
  • How do I convert from decimeters to decameters?
  • I can't do scientific notation on my calculator.
  • What are independent and dependent variables and how do I put them on a graph?
  • You wanted the graph to be on graph paper?
  • I did measure exactly 5 grams of salt on my balance! ( ... with salt in a beaker that wasn't massed.)
  • What do I do next?

Sound familiar? If you teach middle or high school science, these are probably questions you’ve heard a thousand times. And if you’re anything like me, you're always looking for ways to build essential science skills early in the year—so your students are more confident, independent, and lab-ready.

That’s exactly why I created these 17 Essential Science Skills Stations—hands-on, low-prep, and perfect for reinforcing key science lab skills across biology, chemistry, physical science, or general science classes.

🧪 “I used these during the first two weeks of school, and my students were so much more confident during our first full lab! Total game-changer.” – Melissa B., HS Biology Teacher

What are the essential science skills?
In the first days and weeks of a new school year, I need my students to be proficient in the following:
  • Metric measurement
  • Identification of pieces of lab equipment
  • Scientific method
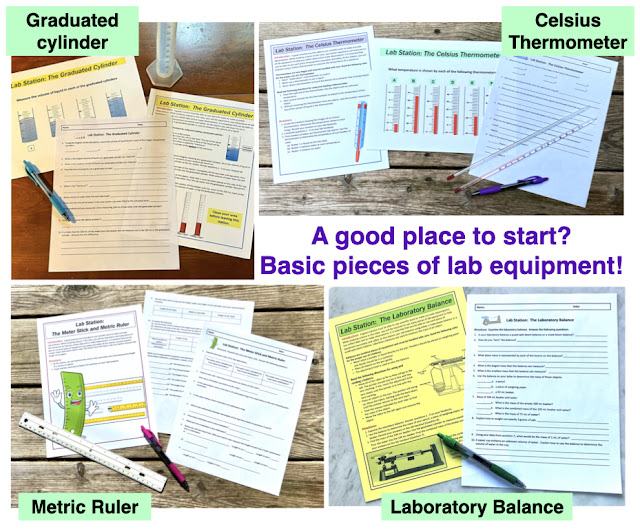
  • Use of basic pieces of lab equipment such as the graduated cylinder, Celsius thermometer, laboratory balance, and metric ruler.
  • Tabling, graphing, and analyzing data.
  • Math skills: Scientific notation, dimensional analysis, significant digits
To accomplish this goal of proficiency of science skills, I have developed Science Skills Chat! -- a set of 17 Lab Stations to address 17 essential science skills all science students should know. I use the word "chat" to emphasize to my students that they are to work together and have a productive discussion at each station in order to maximize their understanding and mastery of the concepts being covered. 

Peer tutoring is a powerful learning tool!


Click on red text or any image to view Science Skills Chat in my TpT store.


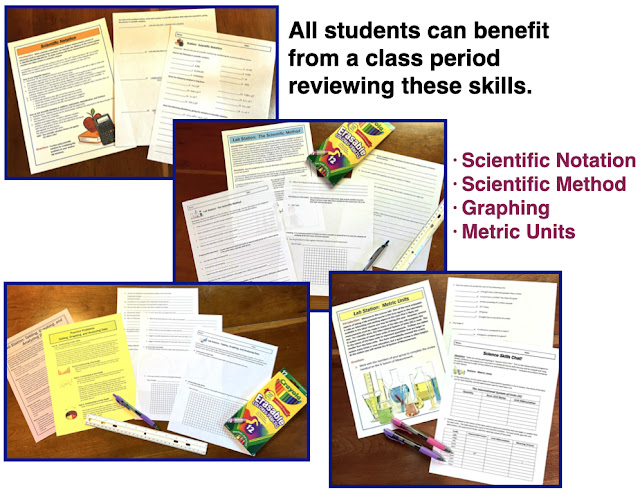
What are the 17 Essential Science Skills?
  • Metric Units
  • Identification of Lab Equipment 
  • Scientific Notation
  • Dimensional Analysis
  • Significant Digits
  • The Scientific Method
  • Tabling, Graphing, and Analyzing Data
  • The Graduated Cylinder 
  • The Metric Ruler 
  • The Laboratory Balance 
  • The Celsius Thermometer 
  • The Bunsen Burner 
  • Determining the Volume of Solids 
  • Separating a Mixture 
  • Determining Density 
  • Accuracy, Precision, and Percentage Error
  • Scientific Drawings 


Don't try to complete all 17 lab stations at once. Choose a set of skills (perhaps 4 or 5 lab stations) to be completed during the first week of school. Choose the skills that are of immediate concern to you. Remember, some students may already be proficient in these skills, but other students will be struggling. No matter the ability level, ALL students will benefit from this review and reinforcement. 

Click on red text or any image to view Science Skills Chat in my TpT store.


Once your students have mastered the first set of skills that you deem most important, set up another lab station day to work on skills that students will soon need to know. 

I like the idea of having "Science Skills Friday" where you choose 4 or 5 lab stations to complete. The information in a fewer number of lab stations is not overwhelming, and it is a fun and different way to end the week. There are enough lab stations in Science Skills Chat to create several "Science Skills Friday" sessions.

Click on red text or any image to view Science Skills Chat in my TpT store.


Ten of the lab stations require some sort of lab equipment, but the other 7 skills are perfect activities to leave in your substitute teacher folder. In an emergency, your sub can grab a few of these and create a VERY quality lesson in your absence.

It may seem like you are spending a lot of time at the beginning of the year to cover these 17 science skills, but I guarantee that it is time well spent. As your school year progresses, you will spend far less time repeating and re-teaching skills that your students should already know.  

And, how nice would it be to reduce the number of questions you get every time you go to the lab?


P.S.  I have 11 Chat Lab Station Activities on a variety of topics.  You can view them all here:


Biochemistry Lab: Testing Foods for Organic Compounds.


What types of organic compounds are contained in the foods we eat? Sometimes an old idea is still the best way to teach a concept.  That is how I feel about this lab, "Testing Foods for Organic Compounds."  I have been doing this lab for over 30 years, and I never tire of doing it.  Granted, it is a bit messy and the observed results are sometimes a little subjective, but my students always love these two days in the lab.

This lab is best used during your units on Biochemistry and the Organic Compounds.  Teaching the characteristics of carbohydrates, proteins, and lipids can be dry and tiresome to students, and this lab is a great way to break the monotony of lecturing on these topics.  This lab activity is a two-part activity.  First, students will learn the indicator tests for sugars, starches, proteins, fats, vitamin C, and salt using known solutions.  Once the students understand how to complete these tests, they will test a wide variety of foods to see what compounds are contained in each food.

Before any testing of foods is carried out, students must "practice" to learn the indicator test for each compound.  For example, in order to determine if milk contains simple sugars, students must know how to carry out the test for simple sugars.  This is the purpose of the first part of the lab.  Students are given known solutions so that they can see what the positive test for a particular compound looks like.  Then, when the foods are tested, the students will recognize and understand the results they are getting.  Students will learn the positive and negative tests for the following:


  • Students will test for starch using iodine.
  • Students will test for simple sugars using Benedict's solution.
  • Students will test for proteins using Biuret reagent.
  • Students will test for lipids using the brown paper test.
  • Students will test for the presence of vitamin C using indophenol.
  • Students will test for salt using silver nitrate.
Please note: Obviously, salt is not an organic compound.  However, it is a fun test for the students to carry out, and it provides interesting information about the foods we eat.

Once students know how to use the above indicators, the real fun can begin! Choose a variety of foods that you would like for your students to test.  While you can theoretically use any foods in the experiment, some are easier to test than others.  For example, students will probably be frustrated if you ask them to test dark purple grape juice.  They simply will not be able to see the results of the tests.  I have the best results when testing the following:  Milk, yogurt, egg whites, egg yolks, potatoes, celery, cereals, and an assortment of fruit juices.  The liquid foods can be used straight from their containers.  For solids foods, you will need to prepare a solution of the food using a blender.

What are the benefits of doing this lab?
  • First and foremost, it is just plain FUN!  If students love your lab activities, they will be excited about your class.  These days, having your students excited about your class solves a host of other problems.
  • This lab reviews and reinforces the concepts you have been teaching in your classroom.  Facts about the macromolecules are easier to learn and remember when the students see a practical application of the information.
  • This lab teaches good lab techniques, how to organize data, and how to work in cooperative learning groups.
  • Students lean that a particular food that they thought was "healthy" is really nothing more than sugar and salt.
  • Working through detailed lab procedures teaches a student to read, understand, and follow directions.
  • Students must use their critical thinking and problem solving skills.

Below you can see the lab handouts that I use with my students.  Clicking here or on the image below will lead you to this lab in my TpT store. Complete teacher guide is included that contains an answer key to all questions, directions for preparing the solutions, and tips and suggestions for the successful completion of this lab activity.  


Returning to Your Lab After Summer Break: A "Must-Do" List of Chores


Picture yourself at the end of the school year ... You are punch-drunk from having made it through end of course exams, posting final grades, collecting textbooks, and trying to get your classroom packed up for the summer. You are giddy with excitement about the much needed summer break. It's the last day of school and you just want to go home. Every teacher reading this knows this feeling. It is nearly impossible to have the will power to start preparing for NEXT school year on the last day of THIS school year.

Fast forward ... Summer is over and you are heading back to school.  What are the first, most important things you need to do when you return to your classroom and lab?  Perhaps this check list of 18 Must-Do Chores will help get you started.

#1  Not a chore, but a directive!  Go back to school a day or two before the other teachers.  Head straight to the lab and get it ready for school. Your classroom decorations can wait.

#2  Assess the summer "damage."  At my school, every single room is emptied over the summer so that the floors can be stripped, cleaned, and waxed.  When the furniture and supplies are returned to the lab, they are never put back where they belong.  Your first chore is simply organization. Get the tables, lab stools, boxes, etc., back where they belong.

#3  Assess the "real damage."  Check the water faucets at every single lab station because some of them will be leaking.  Check each and every gas jet because some students will have stuck their pencils in the end of them, breaking off the pencil tip inside.  Set aside the stools and desks that are damaged.  Check each electrical outlet.  Make a list of everything that requires a fix and move on to #4 right now!

#4  Go find the custodian.  In fact, when you arrive on this first day back, bring a plate of cookies for the custodian!  We lab teachers require the help of the custodian more than the classroom teachers.  Take your neatly written damage list and very sincerely ask for help in getting the repairs completed before students arrive.

#5  Clean, clean, and clean some more!  Get your paper towels and cleaning supplies and get to work.  Wipe down all lab tables and other surfaces. Check the drain of each sink to remove any debris caught in the drain.  Leave paper towels and Windex/Lysol spray bottles at each station so that students will be able to clean at the end of their lab.
#6  Check your fire safety equipment.  Is the fire extinguisher properly charged?  Is the fire blanket in a handy location?  Can you easily open the fire blanket container?

#7  Flush your eye wash station.  How many of us are diligent about flushing the eye wash weekly, or even monthly?  Check out this blog post on the eye wash fountain and safety shower for loads of information.

#8  Flush the safety shower.  Read the above referenced blog post about how to properly maintain the safety shower.


#9  Check your fume hood.  Click this link to view a great check list from OSHA about the lab fume hood.

#10  On to the safety goggles and sterilizer!  How do you handle goggles?  Do students have their own set, or do they share them with other students?  How are they cleaned and sanitized?  Goggles have to be worn, and they must be sterilized.  Before students return, be sure to hand-wash all goggles and sanitize them in a properly functioning sterilizer.  This blog post will provide you with additional details about lab safety goggles.
#11  Don't forget about the chemical storage area.  Make sure that chemicals are stored properly and safely and organized according to the "rules." Not sure how your chemical storeroom should be organized?  This article has everything you need to know about your chemical storeroom.

#12  Check your First Aid Kit!  Take an inventory of the items in your first aid kit.  Make a list of items such as band aids, ointments, alcohol wipes, etc., that need to be replaced.

#13  Clean out the lab refrigerator.  I guarantee you that someone left their lunch there months ago.

#14  Make sure lab safety aprons are clean and easily accessible as students enter the lab.

#15  Prepare a basic set of lab equipment and store a set at each lab station.  This will save you time all year long, and will prevent students from wandering all over the lab looking for equipment.  Consider placing the following at each lab station:  Bunsen burner and hose, ring stand and rings, wooden test tube rack, graduated cylinder, stirring rod, ruler, stopwatch. Include any other items that you frequently use.

#16  Identify designated areas and put up signs.  Where will students place their backpacks as they enter the lab?  Where should students place their dirty glassware?  Where is chemical waste placed?  Where should students wash their hands?  Make clear instruction signs, laminate them, and place them in the best location for your lab.

#17  Make a list of supplies you need to order.  Make sure that you have the latest catalogs.  Throw away the old ones!  Determine what supplies you need for the new school year, and get your lab order in to the purchasing department as quickly as possible.  The early bird gets the worm!

#18  Plan your lab safety instruction unit. In the very first few days of school you need to teach a lab safety unit to your students. Students need handouts of all lab safety rules. You need to have each student fill out a medical emergency form and have parents sign a lab safety contract.


Once your lab is in good condition, what is the next step?
I remember my first few years of teaching … it was incredibly hard to come up with good, rock-solid labs. New teachers need quality labs, and seasoned teachers are always looking to improve upon their lab activity arsenal. These bundles of labs are sure to save you so much time and energy. They have been used with my own students for years with great success.
 
🧬 Biology Lab Bundle:
Cells, Mitosis, DNA, Genetics, Enzymes, Ecology + more
✅ Perfect for 9th and 10th grade Biology
✅ 100% classroom-ready. Just print, set up the lab, and go!
View Biology Lab Bundle →
 
⚗️ Chemistry Lab Bundle:
15 must-do labs covering key topics like density, chemical reactions, thermochemistry, periodic trends, flame tests, and more
✅ Ideal for high school chemistry
✅ Easy to prep, engaging to teach
View Chemistry Lab Bundle →

The Pros and Cons of Outdoor Science Education


The benefits of taking our science students out of the classroom for an outdoor activity are many ... BUT, you better be prepared and super organized!


If I ask my students what the term “environment” means to them, I am going to get a wide variety of answers.  Many of them will automatically think of a beautiful setting in nature, such as a bubbling creek through a forest, a field of wildflowers, or a stand of shimmering evergreen trees along a mountainside.  However, the “environment” is so much more.  It is everything that exists around us.  It is the natural world as well as all of the things that have been produced by humans.  The environment is an incredibly complex web of interactions between the living and the nonliving components of Earth.  I'd wager to say that most of our students pass through their "environment" on a daily basis without ever noticing that "things" are going on.  They may frequent a public park or live on a lake or pond, but rarely do they notice the complex web of interactions that are taking place right before their eyes.
 

When I go outside my mind is racing a mile a minute.  Even if I am walking across the parking lot to enter my local Wal Mart I am going to notice a bird singing or that the clouds are particularly fluffy.  Admittedly, I am a big nature nerd, but I get so much joy from experiencing nature, and I want my students to experience this as well.

The million dollar question is, "Can I get my students to think like me?"  

The students sitting in our classrooms today are going to be the decision makers (and voters) of tomorrow.  The bottom line is that Planet Earth needs our protection.  We have to teach our students about the natural world, and about the things that damage the natural world.  And the first step to effective environmental education is simple ... We have to get our students to NOTICE what is going on around them.  

How do we accomplish getting teenagers to notice nature when that is probably the last thing swirling around in their teen-aged brain?  The answer is:  Take them outside and force them to notice.  Oh, don't be fooled by their initial excitement when you announce to the class that the next few days will be spent outdoors.  They are already thinking that this is going to a welcome holiday away from the classroom setting!  You, the instructor, will have to be organized.  You must have a solid plan and procedure for what the students will be expected to do.  And you must give enough weight to the grade that it grabs their attention.

Let's think carefully about the pros and cons of this venture before we begin.

Pros:
  • The first is obvious:  Students love to go outside!
  • The ecological concepts we teach in the classroom can be reinforced by a quality outdoor activity.
  • Students practice the skill of making good observations.
  • It teaches and reinforces a different sort of data collection than they normally experience in a laboratory setting.
  • An outdoor activity will probably involve drawing and mapping which will appeal to many of the students.
  • It teaches students to pay attention and notice the world around them.
  • Instilling a love of nature in a student will hopefully lead to an adult who wants to protect nature.
  • The benefits of group work and the reinforcement of social skills are certainly life lessons that will be utilized long after the subject matter is forgotten. 
  • It doesn't matter if you live in the city or in the country.  If you have plants, then you have an ecosystem that can be studied.
Cons:
  • It can be time consuming:  Can you give up several days to carry out one project?
  • Classroom management:  Will the students behave outdoors?
Tips on Getting Started:  
  • Know what you want to accomplish.  Have a well thought-out plan with concrete objectives.  Don't take students outside and "wing it." That is a recipe for disaster.
  • Have specific goals in mind when designing your activity.  Know what you want the students to learn from doing the activity.
  • Make the assignment an important part of their grade so that most of the students will be willing to do quality work.

I like to do an activity that I call "Exploring an Ecosystem" in which I have my students study and analyze the physical features of an ecosystem, the living organisms within the ecosystem, and the interactions between these two components.  It involves marking off an area with stakes and string that measures 5m x 5m.  Students are required to work in close-knit groups to draw a detailed ecosystem site map and provide a color-coded key for everything in their ecosystem.  The students will identify the living organisms in their ecosystem and answer a detailed set of 29 questions designed to prompt them in making good observations.  Students will make food chains and food webs using the organisms in their ecosystem.  Students look for abiotic factors, biotic factors, evidence of competition, camouflage, predator/prey relationships, limiting factors, etc.

My objectives may seem simple, but they are actually quite involved:  
   The student will survey an ecosystem to map out the physical characteristics of the land and to identify the living organisms that inhabit the ecosystem.
   The student will describe and analyze the various relationships that exist within the ecosystem.

To ensure that my students accomplish my objectives I provide them with a set of handouts that provide clear instructions, safety precautions, and detailed analysis questions.


Click on image to view this resource in my TpT store.

Make sure that the students read the lab handouts, including all analysis questions, before beginning the project.  The questions are designed to guide the students in their observations of the selected ecosystem.  Students will often miss interactions that are occurring simply because they do not know to look for them.  Many of the questions used in this activity will prompt students into making good observations.

Click this image to view my Ecosystems PowerPoint.
I highly recommend that students receive prior instruction before tackling an outdoor project. In order to complete this ecosystems study, students should be familiar with key concepts in ecology. A few days of classroom instruction are needed to make sure that the students benefit from the days spent out of the classroom.  If the students are unprepared, the outdoor activity can quickly degenerate into playtime and goofing around. The benefits of outdoor learning are many, and the negatives are few, provided that you have a quality assignment, concrete learning objectives, and a good classroom management plan in place.

Have fun teaching outdoors!!