menu   Home About Me Home freebies My Store  
 photo 3am_AB_f1_zps652b0c0f.png    photo 3am_ab_gplus_zps3ab6fefc.png    photo 3am_ab_pin_zpsbfebd6d2.png    photo 3am_tpt1_zpse91e0740.png   photo 3am_ab_email1_zpsebc98a17.png

Search My Blog

Showing posts with label laboratory. Show all posts

17 Essential Science Skills All Students Should Master


Do your students ask you questions like these?

  • Which one of these things is the graduated cylinder?
  • How do I convert from decimeters to decameters?
  • I can't do scientific notation on my calculator.
  • What are independent and dependent variables and how do I put them on a graph?
  • You wanted the graph to be on graph paper?
  • I did measure exactly 5 grams of salt on my balance! ( ... with salt in a beaker that wasn't massed.)
  • What do I do next?

Sound familiar? If you teach middle or high school science, these are probably questions you’ve heard a thousand times. And if you’re anything like me, you're always looking for ways to build essential science skills early in the year—so your students are more confident, independent, and lab-ready.

That’s exactly why I created these 17 Essential Science Skills Stations—hands-on, low-prep, and perfect for reinforcing key science lab skills across biology, chemistry, physical science, or general science classes.

🧪 “I used these during the first two weeks of school, and my students were so much more confident during our first full lab! Total game-changer.” – Melissa B., HS Biology Teacher

What are the essential science skills?
In the first days and weeks of a new school year, I need my students to be proficient in the following:
  • Metric measurement
  • Identification of pieces of lab equipment
  • Scientific method
  • Use of basic pieces of lab equipment such as the graduated cylinder, Celsius thermometer, laboratory balance, and metric ruler.
  • Tabling, graphing, and analyzing data.
  • Math skills: Scientific notation, dimensional analysis, significant digits
To accomplish this goal of proficiency of science skills, I have developed Science Skills Chat! -- a set of 17 Lab Stations to address 17 essential science skills all science students should know. I use the word "chat" to emphasize to my students that they are to work together and have a productive discussion at each station in order to maximize their understanding and mastery of the concepts being covered. 

Peer tutoring is a powerful learning tool!


Click on red text or any image to view Science Skills Chat in my TpT store.


What are the 17 Essential Science Skills?
  • Metric Units
  • Identification of Lab Equipment 
  • Scientific Notation
  • Dimensional Analysis
  • Significant Digits
  • The Scientific Method
  • Tabling, Graphing, and Analyzing Data
  • The Graduated Cylinder 
  • The Metric Ruler 
  • The Laboratory Balance 
  • The Celsius Thermometer 
  • The Bunsen Burner 
  • Determining the Volume of Solids 
  • Separating a Mixture 
  • Determining Density 
  • Accuracy, Precision, and Percentage Error
  • Scientific Drawings 


Don't try to complete all 17 lab stations at once. Choose a set of skills (perhaps 4 or 5 lab stations) to be completed during the first week of school. Choose the skills that are of immediate concern to you. Remember, some students may already be proficient in these skills, but other students will be struggling. No matter the ability level, ALL students will benefit from this review and reinforcement. 

Click on red text or any image to view Science Skills Chat in my TpT store.


Once your students have mastered the first set of skills that you deem most important, set up another lab station day to work on skills that students will soon need to know. 

I like the idea of having "Science Skills Friday" where you choose 4 or 5 lab stations to complete. The information in a fewer number of lab stations is not overwhelming, and it is a fun and different way to end the week. There are enough lab stations in Science Skills Chat to create several "Science Skills Friday" sessions.

Click on red text or any image to view Science Skills Chat in my TpT store.


Ten of the lab stations require some sort of lab equipment, but the other 7 skills are perfect activities to leave in your substitute teacher folder. In an emergency, your sub can grab a few of these and create a VERY quality lesson in your absence.

It may seem like you are spending a lot of time at the beginning of the year to cover these 17 science skills, but I guarantee that it is time well spent. As your school year progresses, you will spend far less time repeating and re-teaching skills that your students should already know.  

And, how nice would it be to reduce the number of questions you get every time you go to the lab?


P.S.  I have 11 Chat Lab Station Activities on a variety of topics.  You can view them all here:


Returning to Your Lab After Summer Break: A "Must-Do" List of Chores


Picture yourself at the end of the school year ... You are punch-drunk from having made it through end of course exams, posting final grades, collecting textbooks, and trying to get your classroom packed up for the summer. You are giddy with excitement about the much needed summer break. It's the last day of school and you just want to go home. Every teacher reading this knows this feeling. It is nearly impossible to have the will power to start preparing for NEXT school year on the last day of THIS school year.

Fast forward ... Summer is over and you are heading back to school.  What are the first, most important things you need to do when you return to your classroom and lab?  Perhaps this check list of 18 Must-Do Chores will help get you started.

#1  Not a chore, but a directive!  Go back to school a day or two before the other teachers.  Head straight to the lab and get it ready for school. Your classroom decorations can wait.

#2  Assess the summer "damage."  At my school, every single room is emptied over the summer so that the floors can be stripped, cleaned, and waxed.  When the furniture and supplies are returned to the lab, they are never put back where they belong.  Your first chore is simply organization. Get the tables, lab stools, boxes, etc., back where they belong.

#3  Assess the "real damage."  Check the water faucets at every single lab station because some of them will be leaking.  Check each and every gas jet because some students will have stuck their pencils in the end of them, breaking off the pencil tip inside.  Set aside the stools and desks that are damaged.  Check each electrical outlet.  Make a list of everything that requires a fix and move on to #4 right now!

#4  Go find the custodian.  In fact, when you arrive on this first day back, bring a plate of cookies for the custodian!  We lab teachers require the help of the custodian more than the classroom teachers.  Take your neatly written damage list and very sincerely ask for help in getting the repairs completed before students arrive.

#5  Clean, clean, and clean some more!  Get your paper towels and cleaning supplies and get to work.  Wipe down all lab tables and other surfaces. Check the drain of each sink to remove any debris caught in the drain.  Leave paper towels and Windex/Lysol spray bottles at each station so that students will be able to clean at the end of their lab.
#6  Check your fire safety equipment.  Is the fire extinguisher properly charged?  Is the fire blanket in a handy location?  Can you easily open the fire blanket container?

#7  Flush your eye wash station.  How many of us are diligent about flushing the eye wash weekly, or even monthly?  Check out this blog post on the eye wash fountain and safety shower for loads of information.

#8  Flush the safety shower.  Read the above referenced blog post about how to properly maintain the safety shower.


#9  Check your fume hood.  Click this link to view a great check list from OSHA about the lab fume hood.

#10  On to the safety goggles and sterilizer!  How do you handle goggles?  Do students have their own set, or do they share them with other students?  How are they cleaned and sanitized?  Goggles have to be worn, and they must be sterilized.  Before students return, be sure to hand-wash all goggles and sanitize them in a properly functioning sterilizer.  This blog post will provide you with additional details about lab safety goggles.
#11  Don't forget about the chemical storage area.  Make sure that chemicals are stored properly and safely and organized according to the "rules." Not sure how your chemical storeroom should be organized?  This article has everything you need to know about your chemical storeroom.

#12  Check your First Aid Kit!  Take an inventory of the items in your first aid kit.  Make a list of items such as band aids, ointments, alcohol wipes, etc., that need to be replaced.

#13  Clean out the lab refrigerator.  I guarantee you that someone left their lunch there months ago.

#14  Make sure lab safety aprons are clean and easily accessible as students enter the lab.

#15  Prepare a basic set of lab equipment and store a set at each lab station.  This will save you time all year long, and will prevent students from wandering all over the lab looking for equipment.  Consider placing the following at each lab station:  Bunsen burner and hose, ring stand and rings, wooden test tube rack, graduated cylinder, stirring rod, ruler, stopwatch. Include any other items that you frequently use.

#16  Identify designated areas and put up signs.  Where will students place their backpacks as they enter the lab?  Where should students place their dirty glassware?  Where is chemical waste placed?  Where should students wash their hands?  Make clear instruction signs, laminate them, and place them in the best location for your lab.

#17  Make a list of supplies you need to order.  Make sure that you have the latest catalogs.  Throw away the old ones!  Determine what supplies you need for the new school year, and get your lab order in to the purchasing department as quickly as possible.  The early bird gets the worm!

#18  Plan your lab safety instruction unit. In the very first few days of school you need to teach a lab safety unit to your students. Students need handouts of all lab safety rules. You need to have each student fill out a medical emergency form and have parents sign a lab safety contract.


Once your lab is in good condition, what is the next step?
I remember my first few years of teaching … it was incredibly hard to come up with good, rock-solid labs. New teachers need quality labs, and seasoned teachers are always looking to improve upon their lab activity arsenal. These bundles of labs are sure to save you so much time and energy. They have been used with my own students for years with great success.
 
🧬 Biology Lab Bundle:
Cells, Mitosis, DNA, Genetics, Enzymes, Ecology + more
✅ Perfect for 9th and 10th grade Biology
✅ 100% classroom-ready. Just print, set up the lab, and go!
View Biology Lab Bundle →
 
⚗️ Chemistry Lab Bundle:
15 must-do labs covering key topics like density, chemical reactions, thermochemistry, periodic trends, flame tests, and more
✅ Ideal for high school chemistry
✅ Easy to prep, engaging to teach
View Chemistry Lab Bundle →

Taking Students to the Laboratory? How to Plan and Execute the Perfect Lab Activity.


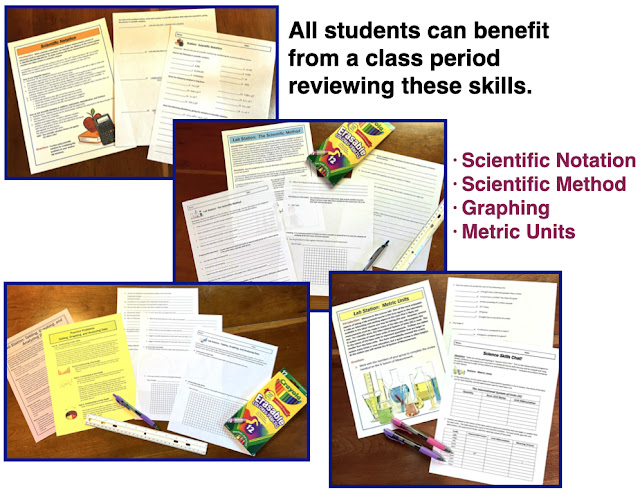
Use this teacher checklist when planning ANY lab activity!

Recently I had the opportunity to work with a small group of science teachers in an inservice-type situation.  The group ranged in their teaching experience. Some were brand new teachers, while others had a few years under their belt.  None were what I would call "knowledgeable veterans." As our time together progressed, it quickly became obvious to me that these teachers needed help with "the lab."  For the inexperienced science teacher, "the lab" can be a scary and potentially dangerous place.

There seems to be a diverse spectrum in science teaching in regard to the laboratory.  At one extreme end of the spectrum are the teachers whose fear of the lab prevents them from ever taking a group of students into the lab.  At the opposite extreme are the science teachers who forge blindly ahead without giving thought to a set of basic guidelines and procedures concerning laboratory activities.  To be fair, I have certainly just described polar opposites in science teachers.  Almost all science teachers will fall in the middle somewhere, and all of us could use a refresher course when it comes to taking students into the lab.

After giving this topic much thought, I have developed a "Laboratory Checklist" of items we science teachers need to consider before taking our classes into the lab.

Begin with a very easy test by asking yourself two simple questions:

1.  Is this lab activity age appropriate?  All science students need to be challenged with activities that are appropriate for their age, and that push them to the next level of critical thinking and problem solving.

2.  Does this lab meet an educational goal or objective? (Pardon me, while I get up on my soapbox...)  The lab activity must meet an educational objective or goal.  There has to be a REASON for doing the lab. The lab should be related to the concepts being taught in the classroom, and should reinforce and/or further the student's understanding of those concepts.

If you can answer "yes" to both of these questions, then proceed with the lab. If you answer "no" to one or both of these questions, you should throw out the lab idea and look for another, more appropriate, lab activity.

Assuming that the lab has met the standards posed by the first two questions, it is time to plan the lab activity.  Consider the following items before lab day arrives.

3.  Safety First!  The safety of the students should be your first thought when planning a lab activity. Are the items on the materials list appropriate for your students?  Think long and hard about the potential hazards of the lab, and identify the areas in which an accident might be possible. (It is assumed that you carried out lab safety instruction with students in the first week of school!)  In planning your lab activity, identify areas of concern and develop a plan of action in the event of an accident.

4.  Using chemicals?  Read the MSDS!!  A Material Safety Data Sheet (MSDS) should be on hand for every chemical you use in the lab. When chemicals are ordered, each will arrive with an MSDS.  Read each page and place them in a three-ring binder for easy and immediate access.  This binder should always be present in the lab.  The MSDS will alert you to any dangers associated with the chemical, and list first aid instructions in the event they are needed.

5.  Carry out the lab yourself before trying it out with the students!  Teachers who are doing the lab for the first time in the presence of students are asking for trouble.  By carrying out the experiment prior to lab day, the teacher can:   (1) Make sure that all equipment and supplies are on hand and in good working order, (2) Identify the problem areas in which students will need to be alerted,  (3) Determine if the experiment will actually work, (4) Look for alternative supplies if needed, and (5) Make any adjustments needed in the lab procedural steps.

6.  How much time will the lab take?  If students finish the lab experiment quickly, no problem!  They can spend the remaining minutes cleaning their lab area and preparing their lab reports.  But what will you do if class time runs out before students can finish the experiment?  This will surely happen on some lab days.  Have a plan.

7.  How will you set up the lab stations and/or the supply area?  An effective and meaningful lab runs like clockwork.  Identify the traffic flow problems beforehand and set up the supply areas in a way that reduces student traffic jams. You may decide that each lab station should be supplied with every item needed for the experiment, or it may work better to have a general supply area that students go to for the items they need.  No two labs are the same.  Identify the best solution for each lab.

Once steps 3 - 7 have been checked off, you are ready to take the kids to the lab.  The following items on the checklist will ensure that your lab activity is a huge success!

8.  Provide the students with written instructions.  Students must receive lab handouts that clearly identify the safety precautions and the exact procedure for the experiment. Giving oral instructions that reinforce the information on the lab handout is okay, great even.  Giving oral instructions instead of providing a lab handout?  NOT okay.

9.  Always schedule pre-lab time. During the pre-lab time, provide the students with the lab handouts they will be using during the lab.  Go over your expectations for the lab, and explain what is to be accomplished by doing the lab.  You may want to use a "Pre-Lab Worksheet" as a homework assignment so that students will be prepared on lab day.  Review the lab safety rules for each and every lab!

10.  How will you group the students?  There is no correct answer to this question.  Should you allow the students to choose their own partners?  Should you place students in groups of YOUR choosing?  Should you have groups of 2 or 4?  Every lab is different.  You know your students and you know what you can expect from them.  One class may be mature enough to allow you to let the students choose their own partner, while this would never work in another class.  I sometimes allow students to choose their own groups, but I most often choose the student groups myself.  At the beginning of the school year I place the name of each student on an index card.  Prior to the lab activity I place these index cards at the lab stations.  As the students enter the room they look for their card.  This allows me to quickly and easily place students in lab groups.  Life lessons are also learned by having students work in a different group each lab period.

11.  Monitor and keep a watchful eye during the lab.  There will be many students in the lab, and there will only be one of you.  You must be confident that you can control and manage the class in situations involving chemicals, sharp items, glassware, hot plates / Bunsen burners, etc.  Do not carry out a lab activity if the equipment and supplies being used causes you worry. Simply find another lab activity.  During the lab activity, be vigilant in monitoring and interacting with the students.  You are the person in the room that has the ability to ward off and prevent accidents from occurring.

12.  Allow enough time at the end of the class for students to clean up their lab station.  At 5 minutes before the bell, the lab activity must end. If students are still working, you must instruct them to stop, and begin their clean up procedures. You do not want the students in the next class to walk in and see a huge mess. You want the next class to walk in and see a highly efficient and organized lab set up. It sets the tone. It makes a difference.

13.  Be timely in breaking down the lab.  As a courtesy to your fellow science teachers who use the same lab, make sure to break down your lab quickly so the lab will be ready to use by the next person. Wash the glassware, wipe down the lab tables, put away all equipment, and make sure to dispose of chemicals correctly.  Your team mates will be most appreciative!

14.  Make an assessment plan.  How are you going to evaluate the work done by the students on the lab activity?   Will they write a lab report? Will there be lab questions on the upcoming chapter test?  Will there be a lab quiz?  Assessment is an important part of the process.  It tells the student that the activity was important.  If you never give a grade, lab report, or take any type of assessment on the lab activity, it sends the message that lab activities are just "fun times / free times."  This will lead to horseplay and behavior problems on future lab activities.

15.  Make a plan for students who are absent on lab day.  I wish I could offer the perfect solution to this problem.  If you have developed a plan of action that works, please let the rest of us know.  The simple truth is that when students are absent, they have missed valuable instruction time that cannot be recovered.  I have scheduled lab make up days after school, given alternate assignments, and given absent students sample data to analyze.  I am still looking for a better solution.  Any thoughts?

Lab days are my favorite days at school.  Being proactive and organized in your approach to lab activities will ensure that your day is smooth, and that students are highly engaged in the learning process.

Happy Lab Day!

Using Poinsettia Leaves as an Acid / Base pH Indicator

Click image to view this resource in my TpT store.

I LOVE this fun holiday activity!

We science teachers know that many plants contain pigments that can be used as pH indicators.  I think we have all created a stink in our homes or labs by boiling red cabbage to use the "juice" as an acid/base indicator!


Did you know that you can do the same with the pigments found in red Poinsettia leaves?

These plants contain anthocyanins, which are water soluble pigments.  These pigments are responsible for the the red, purple, and blue colors seen in flowers, fruits, and vegetables. Anthocyanins respond to changes in pH.  I absolutely love lab activities that use items like this in the lab.  My students are often surprised and excited to discover that household items, such as the Poinsettia or red cabbage, can be used for scientific purposes.  Using the Poinsettia leaves as an acid/base indicator makes for a super fun lab activity around the holidays.

In this lab, the students will use a pigment solution extracted from the leaves of the poinsettia to establish a known pH baseline.  Students will then use this baseline to predict the pH of common household items.

The images below will give you a great idea of all that is involved with this lab. Click on any image below to view this resource in my TpT store.


I hope you find this useful in your science classes.  Enjoy the holiday season!

Lab Safety Tip: What You Need to Know About the Eyewash Fountain and the Lab Safety Shower


👉👉 Required Reading for the Week:


When was the last time you tested your eye wash fountain and your lab safety shower? Did you know that they are supposed to be flushed once a week according to ANSI standards? I think it is safe to say that the plumbed emergency equipment in our science labs is often neglected. We walk past the eyewash and the shower day after day after day, but rarely stop to inspect it. Since I have never had to pull the handle (thankfully!) on either piece of equipment in an emergency, I rarely stop to think about the routine maintenance that is required.

But I am not an expert. And while I hope this blog post puts a nagging reminder in your brain, use the links in this post to read what the experts have to say. My go-to source of lab safety information is Flinn Scientific. Read this article about the eyewash and safety shower.

Here are the basics about the lab eyewash fountain:
  • The eyewash must provide a flow of water to both eyes simultaneously.
  • The affected area must be irrigated for a minimum of 15 minutes.
  • Keep both eyes open and rotate eyeballs in all directions.
  • Regulation of volume and pressure is required to maintain a soft flow of water to the eyes.
  • Location of the eyewash is important.  Travel time from a work station to the eyewash should be within 10 seconds.
  • Water temperature should be "tepid" which means lukewarm. Acceptable temperature range is 78 - 92 degrees Fahrenheit.
  • Weekly testing should occur to verify flow. This also clears the water line to remove dirt from the pipes.

Here are the basics about the lab safety shower:
  • The shower should provide a deluge large enough to encompass the whole body.
  • Remove contaminated clothing. Every second counts. Don't be modest. It will only slow you down. Remove contaminated clothing!
  • The shower should deliver a pattern of water that is 20 inches across.
  • Water flow should be 20 gallons per minutes at a velocity low enough to not injure the user.
  • The plumbed safety equipment should be clearly marked with signs and by painting the walls and floor surrounding the equipment a bright color.


For us middle or high school teachers, words cannot begin to describe how busy we are during the school day. If your safety equipment does not meet the standards, it is time to have a talk with your school administrator. The safety of your students depends on it!


And please don't forget to take the time to inspect the equipment. No eye wash fountain should ever look like this!


Looking for a place to start in developing your lab safety unit?  These resources are posted in my TpT store:


Good lab safety instruction is essential in providing safe lab experiences for our students.  Good luck!

Lab Safety Tip of the Week #4

Safety Tip #4:
Wear Your Safety Goggles


Required Reading for the Week:  "Wear Your Safety Goggles."  Click red text to view this article.

Accidents happen so quickly. And hindsight is a wonderful thing. In the above article, a science teacher has permanent damage to the eye after conducting a demonstration with no eye protection. And a college student goes in late to their organic chemistry lab, and joins a group of two other students at the fume hood. An explosion occurs in the hood. The student was present in the lab less than two minutes and now has permanent eye damage. It seems so simple after the fact ... Why didn't you have on your safety goggles?
WHERE ARE YOUR
SAFETY GOGGLES!!!!!

As a science teacher, I have to plead guilty. I have often prepped a lab for my students without wearing goggles. But when my students are engaged in lab activities, I am a stickler for the rules. We wear the goggles. Always. No questions asked. But it is always a battle. Students do not like to wear safety goggles, and I am constantly having to tell students to put their goggles back on. Unfortunately, most of us are having to carry 30 (and sometimes more!) students into the lab. As soon as you tell one student to put their goggles back on, another student across the room has taken theirs off! Sound familiar?

You, as the instructor, have to be persistent and consistent. Establish the rule of wearing safety goggles. Do not deviate from this rule (EVER!), and have consequences for those who do not obey the rules. Have a conversation with your school administration about lab safety to establish a plan of action for those students who fail to follow the rules. You want to make sure that you have "back up" from admin in case consequences to the student need to be doled out.

Let's move away from student behavior, and on to the goggles themselves. What kind should you use? Are all goggles the same?

All goggles are not the same! And even though many types of goggles might meet regulations and guidelines and be approved for our school labs, some of them are not the best choices for our students. In my opinion, eye protection should have a complete and snug fit around the eye, and be held to the face by a strap that goes around the back of the head. Yes, the students hate these types of goggles, but it is a battle worth fighting.  Here is an excellent article from Flinn Scientific about regulations and standards of safety goggles.


Next topic:  The storage and sanitation of goggles.  I took this picture a few years ago while visiting in a neighboring high school. If you are going to use one classroom set of goggles, and students will be sharing goggles with other students, please take great care in the sanitation of goggles. This picture shows a great goggles sterilizer, but it was not being used correctly. Goggles were not placed in individual slots. They were haphazardly thrown in the cabinet. The inside of the sterilizer was dirty, and it was obvious the goggles had never been washed. Here is an excellent video on the use of the goggles sterilizer. If at all possible, I highly recommend that each student have their own pair of goggles that are not shared with another student.


In summary, 
  • Students must wear goggles and this is not negotiable!
  • Make sure you purchase eye protection that meets the safety standards.
  • Practice what you preach!  The instructor needs to be be the role model in laboratory safety.
Looking for a place to start?  These resources are posted in my TpT store:


Good lab safety instruction is essential in providing safe lab experiences for our students.  Good luck!


Lab Safety Tip of the Week #3:

Tip #3:
Be Ready for the Students to Return to Class!

Required reading for this week:  Worst Lab Accidents in History:  Labs are Dangerous!

In today's lab safety tip of the week, I wanted to present some statistics about accidents in school labs.  After doing some internet searching I have come to realize that there is very little in the way of statistics about school lab accidents.  You can find lots of articles about individual accidents, but there is not any cumulative data that I could find.  How many kids get hurt each year?  How many are burned by heat?  How many suffer from chemical  burns?  I wonder how shocked we would be if we had the answers to these questions.

Many students have already returned to classrooms across the country, and the rest will soon follow as Labor Day approaches.  So the focus of the tip of the week is ... Are you ready for the students to return to class?  I am not referring to such things as having enough desks in your room, or getting paper from the supply room.  What I mean is:  Do you have your lab safety plan in place and ready to roll out when students enter your room?

Here is a checklist of things to consider and to have ready when students return to your class:

  • Lab has been inspected.  You have checked all water faucets, electrical outlets and gas jets.  Work orders have been submitted for any faulty items.
  • You have cleaned and tested the eyewash fountain.
  • You have tested the safety shower.
  • Fire blanket is accessible.
  • Fire extinguisher has been inspected.
  • You have enough goggles for each student.  
  • YOU HAVE CLEANED THE GOGGLES!
  • Lab aprons are clean and readily available. 
  • Lab tables are clean and each lab station is stocked with basic items.  
  • Sinks are clean and drain properly. 
  • Chemicals are properly stored and locked in a chemical storeroom.
  • Any unlabeled chemicals should be discarded from the chemical storeroom.
  • Fume hood has been inspected to insure that it draws properly.
  • Glassware has been inspected.  Chipped and broken pieces have been discarded.
  • Exits from the lab are properly marked and unblocked.
  • Lab safety rules are posted in the classroom and in the lab area.
  • Have a handout of lab safety rules, and make enough copies for each student.
  • Have a lab safety contract and have each student and their parents sign it.  Keep on file all year long.
  • Have a medical emergency form for each student.  Be aware of the allergies or other medical conditions of your students.
  • Lecture on lab safety at the start of the year.
  • Prepare a quiz or test on lab safety.  Require each student to score 100% before allowing them in the lab.
  • Have MSDS (Material Safety Data Sheets) for each chemical you plan on using in a lab activity.
  • Talk to your administrator about how a crisis will be handled.  How will you summon help in an emergency?
Whew! There is a lot to do to get ready for our students to return to class!  To sum it up, the lab safety tip of the week is:  Be proactive, be prepared and be ready when the students return.

Have a great school year!


Lab Safety Tip of the Week #2


Tip #2:  
Make Use of Online Resources

Required reading for this week:
8 Violations for School in Wake of Lab Fire

Science teachers simply cannot receive enough training in laboratory safety.  For the first year science teacher, training in laboratory safety is a MUST!  But what about the veteran teachers?  After teaching for 30+ years, do I still need to receive training in laboratory safety?  The answer to that is an emphatic YES!!

Teachers are often asked to plan their own professional development.  In my school district, science teachers from all schools in the district meet as a group before students start school.  After school is in session, the science department within my school has monthly meetings.  I feel sure that this type of professional development occurs in other districts as well.  One priority of these annual or monthly meeting should be refresher courses in laboratory safety.

There are many, many online resources available to science teachers in laboratory safety training. And most of them are FREE.  At every single inservice held at the start of the school year, safety training should be required.  Check out the free lab safety videos from Flinn Scientific. Flinn offers 9 courses in laboratory safety, and each of them is free.  In this video, you can get an overview of all the safety training made available by Flinn,  Take advantage of this amazing resource!  Show one or more of these safety videos in your science department meetings.  (Please note that while I am a big fan of Flinn Scientific, I am in no way connected with this company.)  You can also find very comprehensive (and free) materials at Carolina Biological.

In reading about laboratory safety for this post, it seems that most accidents are occurring in the labs of veteran teachers.  I think arrogance, complacency, and "letting down your guard" are probably to blame.  This is the reason veteran teachers need continuing education in lab safety.  Will a veteran teacher learn anything new from such training?  Maybe not.  But it brings the issue of lab safety to the forefront of our thinking.  We need to be reminded, and often!

To sum it up, the lab safety tip of the week is:  Make Use of Free Online Resources to offer continuing lab safety training for the teachers in your department.

Links to other resources include:

The Lab Safety Institute
Environmental Health and Toxicology
Lab Safety Guidelines
OSHA Guidelines on Lab Safety


Lab Safety Tip of the Week #1

Lab Safety:
Make It A Priority!

Another school year is about to begin. Do you have a lab safety instruction unit ready to use with your science students?

Every year at this time, science teachers must review how they are going to address lab safety with biology and chemistry students. Lessons and materials used with students need to be updated. Solid lab instruction will help ensure that another school year will pass and your lab will remain accident free.

Our science students absolutely need GREAT lab experiences. They need to use chemicals, Bunsen burners, hot plates, and glassware. To do less would be depriving them of a good science education. If you make laboratory safety a top priority with the students, they will respond. When they see you being safe and stressing safety at the beginning of each lab, they will behave appropriately. And if they don't, drastic measures will have to be taken before that student can enter the lab again.

One goal that I set for my blog, is to post a "Lab Safety Tip of the Week." To prepare for this series of blog posts, I did some online searching into lab accidents.  I was looking for up to date statistics about safety in middle and high school labs. While I haven't yet found the stats I am looking for, I did come across this video. It is posted by CSB: US Chemical Safety Board. The video is called, "After the Rainbow."  Without reading another word of this blog post, take 5 minutes to watch this video.

Did you watch it?  If that doesn't make you stop and consider your lab safety instruction, nothing will.

Back to the Lab Safety Tip of the Week.  Here is my first lab safety tip.


Before students walk in the door, have a plan.  The first few days of your class must include the following:
  • Students must get written copies of your lab safety rules.
  • You must go over each and every rule.
  • Take the students to the lab and point out all of the lab safety features:  Eyewash, safety shower, fire extinguisher, fire blanket, etc.
  • Students must sign a lab safety contract.  Parents must sign it too!
  • Students and parents must fill out a medical emergency form.
  • Students must take and pass a lab safety quiz.
Make sure that you know what you are going to do in case of an emergency. Talk to your school admin to make sure that all parties agree on a plan of action.  

Lab Safety Tip of the Week #1:  Develop and implement a lab safety plan.

Looking for a place to start?  These resources are posted in my TpT store:


Good lab safety instruction is essential in providing safe lab experiences for our students.  Good luck!

It's February ... And That Means Daphnia Love is in the Air!

This is the PERFECT lab for a high school biology class on Valentine's Day!

I soooo look forward to this lab each and every year.  Measuring the heart rate in Daphnia is FUN, is fairly easy to do, allows our biology students to work with living organisms in the lab, and perhaps most importantly, it provides an outstanding situation for having our students design and implement their own experiment.

Are you nervous about "student-designed experiments"?  Don't be!  If properly trained and instructed on the front end, the students will surprise you with their creativity and passion for designing an experiment.  But I am getting ahead of myself.  Let me go back to the beginning....

Daphnia are tiny crustaceans, closely related to a shrimp. They are often called "water fleas." They are small, but not microscopic.  They can be seen with the naked eye, but you will need a dissecting microscope to view the beating heart. Daphnia can be purchased from any of the companies that sell lab supplies and equipment. Since Daphnia are arthropods, they demonstrate the three major arthropod characteristics: exoskeleton, jointed appendages, and segmented body. The exoskeleton is clear, allowing the student to easily view the heart. Daphnia are ectotherms and their body temperature changes with the surrounding environment.  This further means that there is a direct relationship between the internal body activities and the external temperature of the water in which it lives.

This sets the stage for the first part of our experiment.  I have my students carry out an experiment where they measure the change in heart rate when Daphnia are exposed to different temperatures.  I provide the procedure, and the student simply follows the instructions and carries out the lab.  The Daphnia are exposed to three different temperatures, and the student counts the number of heart beat per minute in each environmental condition.


Students carry out my procedure, graph their results, and answer my questions.  On Day 2, the fun begins!  It is time for the students to design their own experiment!  They are asked to design an experiment to test the effect of caffeine on the heart rate of Daphnia.  The students must state a hypothesis, describe their experimental and control groups, carry out the experiment, collect their data, graph their data, and come to a conclusion based on their data. 

The student-designed experiment will take some time.  I require my students to write their experiment and submit it to me for approval before they begin. Once approved, they carry out their experiment and write a formal lab report. The best learning occurs as the student is carrying out their experiment.  They invariably realize that their procedure is flawed, and they must revise, revise, and revise until they get it right.

For my honors and AP students I require that they also complete a worksheet on how to calculate the Q10 temperature coefficient.

And this is what we do to celebrate Valentine's Day in my biology classroom.  Happy Valentine's Day everyone!

In my TpT Store: "Measuring the Heart Rate of Daphnia" contains handouts for all parts of this experiment, including the student designed experiment and the Q10 worksheet.  Teacher Guide included.