menu   Home About Me Home freebies My Store  
 photo 3am_AB_f1_zps652b0c0f.png    photo 3am_ab_gplus_zps3ab6fefc.png    photo 3am_ab_pin_zpsbfebd6d2.png    photo 3am_tpt1_zpse91e0740.png   photo 3am_ab_email1_zpsebc98a17.png

Search My Blog

Showing posts with label lab station activities. Show all posts

17 Essential Science Skills All Students Should Master


Do your students ask you questions like these?

  • Which one of these things is the graduated cylinder?
  • How do I convert from decimeters to decameters?
  • I can't do scientific notation on my calculator.
  • What are independent and dependent variables and how do I put them on a graph?
  • You wanted the graph to be on graph paper?
  • I did measure exactly 5 grams of salt on my balance! ( ... with salt in a beaker that wasn't massed.)
  • What do I do next?

Sound familiar? If you teach middle or high school science, these are probably questions you’ve heard a thousand times. And if you’re anything like me, you're always looking for ways to build essential science skills early in the year—so your students are more confident, independent, and lab-ready.

That’s exactly why I created these 17 Essential Science Skills Stations—hands-on, low-prep, and perfect for reinforcing key science lab skills across biology, chemistry, physical science, or general science classes.

🧪 “I used these during the first two weeks of school, and my students were so much more confident during our first full lab! Total game-changer.” – Melissa B., HS Biology Teacher

What are the essential science skills?
In the first days and weeks of a new school year, I need my students to be proficient in the following:
  • Metric measurement
  • Identification of pieces of lab equipment
  • Scientific method
  • Use of basic pieces of lab equipment such as the graduated cylinder, Celsius thermometer, laboratory balance, and metric ruler.
  • Tabling, graphing, and analyzing data.
  • Math skills: Scientific notation, dimensional analysis, significant digits
To accomplish this goal of proficiency of science skills, I have developed Science Skills Chat! -- a set of 17 Lab Stations to address 17 essential science skills all science students should know. I use the word "chat" to emphasize to my students that they are to work together and have a productive discussion at each station in order to maximize their understanding and mastery of the concepts being covered. 

Peer tutoring is a powerful learning tool!


Click on red text or any image to view Science Skills Chat in my TpT store.


What are the 17 Essential Science Skills?
  • Metric Units
  • Identification of Lab Equipment 
  • Scientific Notation
  • Dimensional Analysis
  • Significant Digits
  • The Scientific Method
  • Tabling, Graphing, and Analyzing Data
  • The Graduated Cylinder 
  • The Metric Ruler 
  • The Laboratory Balance 
  • The Celsius Thermometer 
  • The Bunsen Burner 
  • Determining the Volume of Solids 
  • Separating a Mixture 
  • Determining Density 
  • Accuracy, Precision, and Percentage Error
  • Scientific Drawings 


Don't try to complete all 17 lab stations at once. Choose a set of skills (perhaps 4 or 5 lab stations) to be completed during the first week of school. Choose the skills that are of immediate concern to you. Remember, some students may already be proficient in these skills, but other students will be struggling. No matter the ability level, ALL students will benefit from this review and reinforcement. 

Click on red text or any image to view Science Skills Chat in my TpT store.


Once your students have mastered the first set of skills that you deem most important, set up another lab station day to work on skills that students will soon need to know. 

I like the idea of having "Science Skills Friday" where you choose 4 or 5 lab stations to complete. The information in a fewer number of lab stations is not overwhelming, and it is a fun and different way to end the week. There are enough lab stations in Science Skills Chat to create several "Science Skills Friday" sessions.

Click on red text or any image to view Science Skills Chat in my TpT store.


Ten of the lab stations require some sort of lab equipment, but the other 7 skills are perfect activities to leave in your substitute teacher folder. In an emergency, your sub can grab a few of these and create a VERY quality lesson in your absence.

It may seem like you are spending a lot of time at the beginning of the year to cover these 17 science skills, but I guarantee that it is time well spent. As your school year progresses, you will spend far less time repeating and re-teaching skills that your students should already know.  

And, how nice would it be to reduce the number of questions you get every time you go to the lab?


P.S.  I have 11 Chat Lab Station Activities on a variety of topics.  You can view them all here:


Wanna Chat? Reasons why my Chat Lab Stations are working!


The Background Story: A few years ago, I wanted to do something different on the first day of school. Most of the teachers at my school, including me, were doing the same thing all daylong ... Going over the course syllabus, passing out textbooks, reading the dreaded classroom rules. After one class period of this, all that the students heard was "Blah, blah, blah...."  It was definitely time for me to do something different. After giving it some thought, "Biology Chat" was born. My goals for the activity were simple:
(1) Get the kids actively engaged in science on the very first day so they don't dread coming to my class the second day, and (2) Help the students make new friends in our very large school. These goals were accomplished! In fact, the activity was so popular with my biology students that I quickly developed Chemistry Chat for my chem classes.

TL;DR click on any image to view in my TPT store. Or you can click here to view all  my Chats.


Biology Chat

Chemistry Chat

Physics Chat

What is the purpose of my "Chat" lab activities? My "Chat" activities are rotating lab stations and involve collaborative student groups. At each station, students collaborate to resolve a problem, accomplish a task, or conduct a minor science experiment. The term "chat" is used to encourage students to engage in meaningful conversation and teamwork, hopefully deepening their comprehension and mastery of the subject matter content. Let's face it. High school students have "socializing" on their minds all day long. The term "chat" resonates with them, and it has a “fun” tone.


What are the benefits of my Chat Lab Stations?

1.  Students are up, out of their seats, and moving! It is a rare student that can sit in a desk for eight hours and still be conscious at the end of the day. Chat lab stations allow students to move around the room, giving them a bit of a mental break between each station.

2.  Group work is an important part of what we do in a science class, and it is a skill that will be needed throughout life. Lab station activities teach students how to work together to achieve a goal.

3. Differentiation! We all teach classes that contain students of widely-varying ability levels. It is not necessary for every student to complete every lab station. For students with IEP's, have them complete only the stations that are appropriate for them. By carefully selecting the small groups, you can create groups that are supportive and will provide an educational atmosphere that will benefit all members of the group. It is also a good idea to have a "challenge" lab station for the early finishers. I never want idle hands in my classroom!

4.  All too often we throw so much information at the students that they quickly become overwhelmed by sheer volume. Each chat lab station focuses on a single task or concept. This prevents students from becoming overwhelmed by too much information.


5.  Peer teaching/tutoring is highly effective! A struggling student may likely learn more from a fellow student than they do from the teacher. One student can offer another student explanations in a low pressure setting that feels safe to the struggling student.

6.  The more informal classroom setting allows me more time to interact with my students. I love being able to walk around the room and speak to every student. It allows me to connect with the student, both personally and academically. Secondary students may not show the same affection for their teachers as do elementary students, but they still want to be noticed, complimented, and see a friendly smile from the teacher.


Tips for Implementation!
1. Consider very carefully how the students are arranged into groups. I never (or rarely) allow students to choose their own lab groups. Do I want the students to have a little "chat" or social time during the activity? Yes, but I want to control it. I want my students chatting, but I want them chatting about the topics and concepts that I need to teach and reinforce. Before my students arrive in my class, I have already placed them in groups. Each week I change the composition of the groups. This prevents the students from becoming too comfortable and failing to accomplish the goals of the lesson.


2. Make sure that your lab stations offer a good mix of teaching styles and strategies. You don't want students labeling a diagram at every single station. They will quickly lose interest in the activity. Make sure that each station offers a different sort of task or activity.

3. Make sure that each station is independent of the other stations. The activity works so much better if students can rotate from one station to another in any order. If the stations have to be completed in a certain order, a lab traffic jam will likely result.

4. Monitor the students! Make sure that students are on task ... all period long!  

Since developing Biology Chat years ago, I continue to expand on the idea of chat lab stations. Click on any of the photos below to view in my TPT store.


Let's continue the "converstation" in the comments section below. Let me know your questions. Is there a certain topic/concept you would like to see in a future Chat?  Thanks for stopping by, and have fun teaching!

Lab Stations: How to Make Them Work for You!


Lab stations can be a fantastic tool in our teaching arsenal!


Teaching science requires a multi-faceted approach. Students are all over the place in terms of their learning styles, their ability levels, and their attitudes toward learning.  Great science teachers mix it up every day in terms of teaching strategies and approaches for getting across the concepts we need to teach.  Using only one teaching style or strategy, no matter how wonderful it is, will become old and stale if used day after day after day.

In this article, I'll discuss a strategy that has been around since the dark ages, but seems to be all the rage lately.  LAB STATIONS!

What is the lab station approach?

The term "lab station" has come to have different meanings for different people.  Lab stations are a method of instruction where small groups of students work together on a task or activity in order to learn, review or reinforce a concept.  These small groups move or rotate through a series of lab stations or science centers, and complete an activity at each station.  The term "lab practical" is also familiar to many of us, but in my mind, there is a difference between a lab practical and lab stations.  While both practices require rotating or moving between stations, lab practicals are used as tests and assessments.  For example, in an anatomy class one would rotate through the stations of a lab practical in a testing format to demonstrate proficiency in a particular area of animal anatomy and physiology.  The use of lab stations, on the other hand, is a teaching technique that is used to teach, review or reinforce concepts being covered before a test is taken.

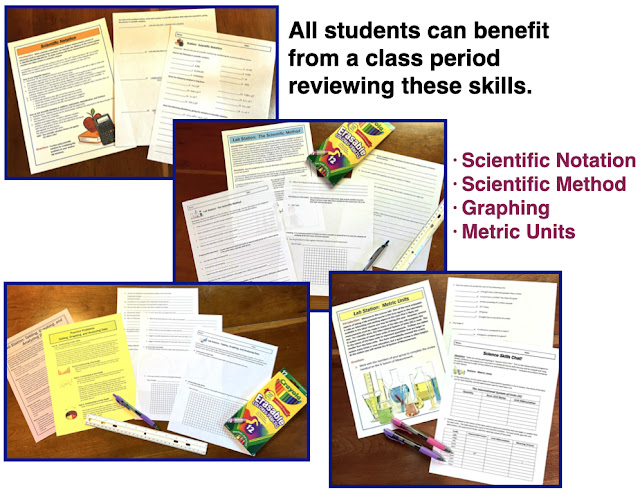
Should lab stations be used as first-day instruction, or saved for a review activity at the end of a unit?  The answer is:  Yes and yes!  On the very first day of school, I have my students complete a lab station activity called Science Chat.  Students are always delighted to learn that they are doing an activity that allows them to be out of their desks.  If lab stations are to be used as first-day instruction, great care must be taken in the way the stations are designed and written.  If no prior instruction has been given, students must have a way to complete the tasks and build upon their pre-existing knowledge.  Lab stations used on the first day of new unit should involve activities that are self-guided inquiry or exploration type lessons.  Lab stations are also a fantastic way to review and reinforce the content of a unit just before an upcoming unit test.  Lab stations used in this way should be written in a style that assumes a certain knowledge base, but challenges the students to use higher order thinking.

What are the benefits of using lab stations?

When used with a combination and variety of other teaching techniques, the use of lab stations is very effective, and because it is so different from other teaching strategies, the benefits are many.

  • One of the most important benefits is that students are up and moving.  Students often need a short "brain break" during class.  It is a very rare student who can sit still for an hour and remain fully engaged the entire time.
  • Lab stations break up the concepts and information into smaller, more manageable, units of learning.  Students often become overwhelmed in a science class when faced with large chunks of new information.  A well-written lab station activity addresses a single concept or task at each station.  For many students, this reduces stress and builds confidence by enabling them to master the smaller units of information.
  • Lab stations allow students to work at their own pace ... within reason, of course!
  • Students enjoy working in a self supervised manner.  
  • Lab stations allow the teacher to interact more freely with students on an individual or small group basis.
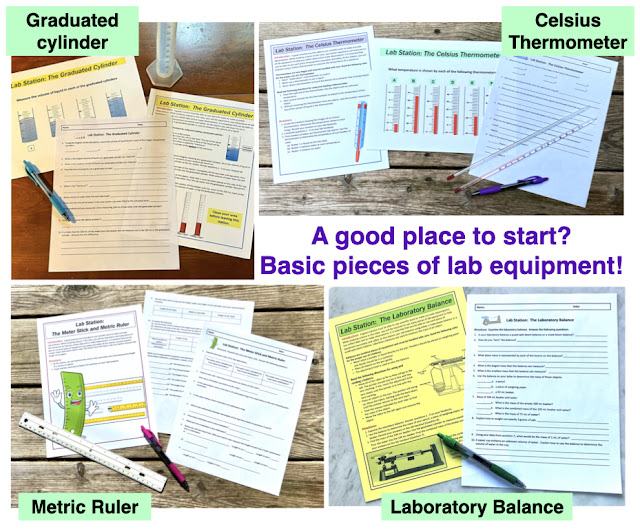
  • Lab stations are perfect for labs that have limited resources.  If, for example, your lab has only one spectrophotometer or only a few pH meters, lab stations can be set up to allow all students to rotate to those stations in order to use those limited pieces of equipment.  
  • Peer teaching and tutoring is very effective! Students often learn better from their peers than they do from adults.  Small cooperate learning groups reduce fear and anxiety amongst students.  
  • Hands-on lab experiments and activities increase mastery of concepts and retention of large amounts of information.
  • Lab stations keep students engaged.  When students know that they are about to move to another location, they are more focused and eager to finish the work at one station in order to move to the next.  When the next lab station involves a completely different type of activity, students are less likely to be off-task.  In other words, the change keeps them on their toes.
  • The transition process gives the students a short mental break.

Planning and Set-up Tips:


Teachers who have never written, set up, or utilized lab stations in their teaching are often afraid to give it a try.  Rather than setting up one lab activity, inexperienced teachers may feel as if they have to set up 8 or 10 lab activities in the same class period. The thought of this raises much anxiety!  Rest assured, setting up a lab station activity is no harder or more time consuming than setting up any lab activity.  In fact, often the prep time is greatly reduced!  I find that setting up one of each station is faster than setting up 15 of the same station.  These additional planning and set up tips will help get you started:

  • Does the activity have goals and objectives that advance the education of your students?  If it is just busy work to keep your students occupied for a day, don't do it.
  • The lab stations should involve a good mix of teaching techniques and learning styles.  Having 10 lab stations that require students to draw and label a diagram at every station will not be effective. Instead, involve the students in different types of activities. Possibilities include small experiments, building structures, reading passages, paper and pencil games, manipulation and ordering of objects, discussion stations, internet research stations, modeling stations or task card stations.  Studies show that varying the types of learning activities greatly increases our ability to master and retain information.
  • Each station should be independent of all other stations.  In other words, it should not matter the order in which they are completed.  
  • How will you place the students in small groups? Should you allow the students to choose their own partners?  Should you place students in groups of YOUR choosing?  Should you have groups of 2 or 4?  Every lab is different.  You know your students and you know what you can expect from them.  One class may be mature enough to allow you to let the students choose their own partner, while this would never work in another class.  I sometimes allow students to choose their own groups, but I most often choose the student groups myself.  At the beginning of the school year I place the name of each student on an index card.  Prior to the lab activity I place these index cards at the lab stations.  As the students enter the room they look for their card.  This allows me to quickly and easily place students in lab groups.  Life lessons are also learned by having students work in a different group each lab period.
  • Each station requires clear signage and complete instructions.  Laminate everything you can so that it can be used year after year.  If students are given a packet of worksheets to complete, make it clear which worksheet is used at each station.  Placing a symbol or piece of clip art on the lab station sign and the same symbol on the corresponding worksheet is a simple and easy solution.
  • Make sure that lab safety precautions are clearly posted at each station.
  • All groups do not have to be the same size.  You know your students and how to group them to maximize the instruction of all.
  • Common sense dictates that all stations should require the same amount of time to complete. Personally, I have found this very difficult to accomplish.  The best solution is to set up multiples of the stations that require more time.
  • You must manage class time effectively.  Continuous monitoring is required to make sure that students are on task and are moving through the stations at the pace you deem appropriate.
  • All students will not finish at the same time.  I suggest setting up an "enrichment" station for the early finishers.  You do not want some students loitering while other students are trying to complete their work.
  • Prior to the lab station activity, decide how you will manage the amount of paper required for the activity.  You might provide each student with a complete packet of handouts, or you might consider placing one set of handouts at the lab station and requiring students to complete the work on their own notebook paper.
  • Students should be required to turn in their own work.  Allowing a group to turn in one worksheet or lab report for the entire group usually results in one person doing the work, and the other group members doing little.
  • Make a rotation plan.  Will you allow the students to move randomly to other lab stations, or will you require them to rotate in a particular order?  
  • Know your space and how to make it work to your advantage.  For example, will the lab station require water or electricity? Or can it be completed at a student desk?
  • Be organized for next year.  Take the time to laminate lab station signs and instruction cards so that you can use them again.  Place all items needed for the activity in a plastic box, or file them  away in your filing cabinet. Include in the box or file folder your notes on what worked well and what didn't work well.  Make a list of any supplies that need to be re-ordered for next year. You will thank yourself for this next school year!

Need to Differentiate?  No Problem!


For inclusion classes (classes containing learners of widely varying ability levels) lab stations can easily be differentiated to meet the needs of all students.  Students with IEP's can participate in the same lab stations by making some minor modifications.  Ways to accommodate special needs learners  might include:


  • All students participate in the same lab stations, but they are given different sets of handouts or worksheets to complete.
  • Because of the random movement of students through the lab stations, you can select which lab stations students will complete. There is no need for a student with special learning modifications to complete every single station.
  • By carefully selecting the small groups, you can create groups that are supportive and will provide an educational atmosphere that will benefit all members of the group.

What is keeping you from trying lab stations?


The most common concerns I hear from new teachers are that they are worried about student behavior as well as the amount of time required to set up and complete an activity.  As for student behavior, students have to be taught and trained from the beginning of the school year in all classroom rules and procedures.  Lab stations are no different.  Refrain from using large groups, and make sure that your expectations are clear and consistent. Teach the students how the process works and what their responsibilities are. Have a set of rules and stick with them.


I hope that if you are new to the idea of lab stations, this article has provided you with some tips and tricks on how to get started.  Has this teaching technique replaced my used of the tradition hour-long lab activity? Absolutely not! Carrying out a full-length lab is VERY important.  But I do enjoy having another "weapon" in my teaching arsenal.

Use this link to view my lab station activities on TpT.

Make the first Day the BEST Day!

It is so easy to get kids excited about science!  We get to "play" with so many cool gadgets and gizmos in our lab activities.  Why not make the FIRST day of school the BEST day of school for our students?  Let them know on the very first day that your class is going to be great!

I have developed three lab station "first day of school" icebreaker activities that I think your science students will love.  


You can use the links below to find the one that is best for your subject area:

Science Chat for Biology and Life Science

Chemistry Chat

Physics Chat

Lab Safety Tip of the Week #1

Lab Safety:
Make It A Priority!

Another school year is about to begin. Do you have a lab safety instruction unit ready to use with your science students?

Every year at this time, science teachers must review how they are going to address lab safety with biology and chemistry students. Lessons and materials used with students need to be updated. Solid lab instruction will help ensure that another school year will pass and your lab will remain accident free.

Our science students absolutely need GREAT lab experiences. They need to use chemicals, Bunsen burners, hot plates, and glassware. To do less would be depriving them of a good science education. If you make laboratory safety a top priority with the students, they will respond. When they see you being safe and stressing safety at the beginning of each lab, they will behave appropriately. And if they don't, drastic measures will have to be taken before that student can enter the lab again.

One goal that I set for my blog, is to post a "Lab Safety Tip of the Week." To prepare for this series of blog posts, I did some online searching into lab accidents.  I was looking for up to date statistics about safety in middle and high school labs. While I haven't yet found the stats I am looking for, I did come across this video. It is posted by CSB: US Chemical Safety Board. The video is called, "After the Rainbow."  Without reading another word of this blog post, take 5 minutes to watch this video.

Did you watch it?  If that doesn't make you stop and consider your lab safety instruction, nothing will.

Back to the Lab Safety Tip of the Week.  Here is my first lab safety tip.


Before students walk in the door, have a plan.  The first few days of your class must include the following:
  • Students must get written copies of your lab safety rules.
  • You must go over each and every rule.
  • Take the students to the lab and point out all of the lab safety features:  Eyewash, safety shower, fire extinguisher, fire blanket, etc.
  • Students must sign a lab safety contract.  Parents must sign it too!
  • Students and parents must fill out a medical emergency form.
  • Students must take and pass a lab safety quiz.
Make sure that you know what you are going to do in case of an emergency. Talk to your school admin to make sure that all parties agree on a plan of action.  

Lab Safety Tip of the Week #1:  Develop and implement a lab safety plan.

Looking for a place to start?  These resources are posted in my TpT store:


Good lab safety instruction is essential in providing safe lab experiences for our students.  Good luck!

Chemistry Chat: A First Day of School Science Lab Icebreaker

Chemistry Chat: 

A Fun and Interactive Icebreaker for the First Day of Chemistry Class


Let’s face it … those first few days of school can be overwhelming. You’re learning names, setting expectations, handing out syllabi, organizing lab safety rules, and trying to get a read on your new group of students. The last thing you want is a room full of glazed-over eyes as you launch into the dreaded reading of the class syllabus. That’s where Chemistry Chat comes in!


Don’t be the teacher that reads the syllabus out loud on the first day. Be the teacher that uses an awesome first day activity to get students out of their seats to help them meet one another. Not only is this a super-duper icebreaker activity, Chemistry Chat also provides you the teacher with valuable insights into the skills your students have (and don’t have!) as they begin your class.


Chemistry Chat is one of my favorite ways to kick off the school year. It’s a simple but powerful icebreaker that gets your students up, moving, talking, and thinking scientifically. It sets the tone for the kind of classroom environment you want to create: collaborative, curious, and chemistry-minded.


What is Chemistry Chat?


Chemistry Chat is a first-day-of-school icebreaker lab station activity that’s designed specifically for chemistry students. It’s structured as a series of engaging chat stations where students work in pairs or small groups to respond to prompts, questions, or mini-tasks that get them talking about science and about each other.


Each station includes a short, open-ended prompt like:

  • "Describe what is happening in the dancing raisin demonstration."
  • "What happened when the magnet was placed against the flask?"
  • "If you could travel anywhere, what place would you choose? Include your answer and those of your group members.  

These prompts are intentionally low-stakes and designed to spark conversation, even among students who are shy or nervous. There’s no “right or wrong” answer at this stage. The goal is to encourage curiosity and create connections."


Why I Love Using Chemistry Chat


💬 It gets students talking.
Chemistry Chat gets students out of their seats and actively engaging with their peers. It gives them a chance to shake off those first-day jitters in a safe, structured way.


🔬 It’s science-minded without being intimidating.
While it’s fun and interactive, Chemistry Chat also introduces your students to key science skills like observation, discussion, inference, and evidence-based thinking.


👥 It builds classroom community.
Students leave class feeling like they belong. They’ve had a chance to meet each other, share ideas, and feel seen and heard.


🧪 It gives you insights.
As you circulate and listen, you’ll get a quick sense of where your students are in terms of prior knowledge, communication skills, and comfort with scientific concepts.


What’s Included in the Resource?

The Chemistry Chat resource comes with everything you need to implement this on Day 1, including:

  • 10 printable lab station cards with thought-provoking chemistry prompts
  • Editable version so you can tailor questions to your specific course
  • Student answer sheet to encourage accountability and reflection
  • Teacher guide with setup tips, timing suggestions, and optional follow-up activities


Want to Try Chemistry Chat in Your Classroom?


This activity is available on my Teachers Pay Teachers store, and it’s ready for you to print and use with minimal prep. You can check it out here:


👉 Chemistry Chat: First Day of School Icebreaker Lab Activity


If you're looking for a fun, low-stress, meaningful way to start your chemistry class off on the right foot, Chemistry Chat might be just what you need. Your students will leave that first day feeling engaged, connected, and excited about the year ahead.


PS: There is also a Biology Chat and a Physics Chat!


Science Chat for Biology: A First Day of School Biology Lab Icebreaker Activity

Make the First Day the BEST Day!


What is the most important day of school? The first day! It's the most important day of the entire school year!!

It is the day when students form their first impression of your class.

It is the day when students look at you and decide on the spot if they are going to like your class or hate your class.

It is the day when students have heightened social anxieties and need to know that they have a friend in your class.

You, the teacher, have one day to get it right. If you do, the rest of year is made so much easier. If you don't, you will spend a lot of time, effort, and energy trying to change the behaviors and attitudes of your students.

Will you be the teacher that goes over a long list of class rules and reads aloud from the class syllabus? Or will you be the teacher that plans a fun and engaging activity for the students on Day 1?

Biology Chat is the perfect way to kick off the first day of school with energy and connection. 
Instead of staying glued to their seats like they’ve likely been all day, this activity gets students up, moving, and interacting with their new classmates. It’s a refreshing change of pace, and a much-needed icebreaker that builds classroom community from the start. As an added bonus, you’ll get an early snapshot of your students' communication skills, lab skills, critical thinking, and overall comfort level in the classroom. It’s fun, informative, and sets a positive tone for the year ahead.

So what exactly is Biology Chat?  The activity consists of 10 Lab Stations.The students will move around at random until they complete all ten stations. At each lab station the students will complete a science task AND answer questions about their classmates. Students must scatter after each station so that they are not with the same group the entire time. After all, one of the objectives is for them to meet everyone in the class.

Each lab station should take about 10 minutes to complete. You want to give the students time to chat. It takes me two class period to finish all of the lab stations, but in my opinion, it is time well spent. You can easily leave out lab stations for a shorter activity.


A different concept is covered at each station.
Station 1:  The Microscope
Station 2:  Graphing
Station 3:  Electron Microscopy
Station 4:  Making Observations, Comparing and Contrasting
Station 5:  Lab Equipment
Station 6:  Laboratory Safety
Station 7:  Classification
Station 8:  Metric Scavenger Hunt
Station 9:  Prefixes and Suffixes
Station 10:  What makes an animal an animal?

Set up for the lab is quick and easy. You'll need only about 30 minutes for set up, and the materials list consists of items you are sure to have on hand.
  Microscope
  A prepared slide of your choice.
  Four images taken with electron microscope (Included in product.)
  Two plants (potted or cuttings)
  Meter stick
  Graduated cylinder
  Triple or quadruple beam balance
  Stopwatch
  Thermometer
  A lab with safety features (Examples:  Eyewash fountain, safety shower, fire extinguisher, fire blanket, fire alarm, etc.)
  A group of objects that can be classified into groups.  (Teacher’s choice.)
  Bag of sugar (or object with similar mass.)
  Can of soda (or object with similar volume.)
  Coin
  Paper clip
  Wood block (or any square or rectangular object.)
  Cotton ball
  4 photographs of living organisms (included in product.)


Sweeten the day by giving the students a grade on the activity. It is unlikely that a student will get all of the answers correct, so make sure to base the grade on effort and participation.

What will the student take away from your day 1 activity? They are allowed to get up, stretch, and move around! They are able to make some new friends! And they start the year off with an excellent grade.  Win-win-win!

I hope that your school year is wonderful!

PS - Be sure to check out Chemistry Chat and Physics Chat! You'll be glad you did!

Paper Chromatography


How to Use Paper Chromatography in the Biology Classroom


Looking for a low-prep, high-impact lab to spark curiosity in your middle or high school biology students? 


👉 Paper chromatography might be the perfect fit. This classic experiment allows students to explore real-world applications of chemistry and biology through hands-on investigation. Whether you're introducing the scientific method, diving into molecular properties, or studying photosynthesis, chromatography is a versatile and visually rewarding lab to include in your curriculum.


What Is Paper Chromatography?

👉 Paper chromatography is a simple technique used to separate the components of a mixture. This method works by taking advantage of the varying solubilities and molecular weights of substances, allowing them to be identified based on how far they travel up a strip of paper in the presence of a solvent. In the real world, chromatography is an essential tool used in fields like forensics, toxicology, and pharmacology. Police labs use chromatography to detect drugs and toxins in blood and urine samples. By introducing this lab to your students, you're connecting them to important STEM career paths, and showing them science in action.


How Does It Work?

👉 The process is straightforward but packed with learning potential. A small dot or line of a sample (like ink or plant pigment) is placed near the bottom of a strip of chromatography paper. This strip is then placed vertically into a container with a shallow layer of solvent. As the solvent travels up the paper by capillary action, it carries the components of the mixture with it.

Here’s why the mixture separates:

  • Solubility: More soluble substances dissolve better in the solvent and move farther up the paper.
  • Molecular Weight: Smaller molecules tend to move more quickly than larger ones.
  • Polarity: The cellulose in the paper is polar. More polar substances stick to the paper and don’t travel as far, while non-polar substances move more freely.


Chromatography Lab Ideas for the Biology or Physical Science Classroom

💧 Ink Separation

A fun and accessible introduction to chromatography is separating black ink from markers. Many black inks are actually mixtures of several colors. When placed in water, water-soluble inks spread apart into bands of dye. Not all markers will work the same way. Permanent inks may require rubbing alcohol or another solvent to separate. This gives students the opportunity to test variables and compare results across different solvents and ink types.


🍃 Plant Pigment Separation

This is a favorite in high school biology, especially during units on photosynthesis or plant biology. Students can extract pigments from leaves and discover that the color they see is actually a mix of chlorophyll-achlorophyll-bxanthophyll, and carotene.

Fall is a perfect time to collect a variety of leaves from trees around your school. But if you’re teaching in winter, spinach leaves from the grocery store work just as well.


Materials You’ll Need

You don’t need a fancy setup to get started. Here's a basic chromatography kit:

  • Chromatography paper (filter paper or coffee filters can work in a pinch)
  • Small containers (test tubes, jars, or beakers)
  • Solvents (water, rubbing alcohol, acetone, or other safe household solvents)
  • Samples to test (leaves, markers, food dyes, etc.)
  • Pencils, rulers, and scissors


Tip for teachers: Always test your materials and solvents in advance. Be sure to follow proper lab safety protocols, especially if using alcohols or other flammable substances.


What Solvent Should You Use?

The answer depends on the solubility of your sample. Water works well for many inks and food dyes. For permanent markers or plant pigments, isopropyl alcohol or acetone may be more effective.

Pro Tip: Encourage students to design their own investigations. They can test multiple solvents on the same type of ink or compare different brands of markers to determine which separates most clearly.


Why Use Paper Chromatography in the Biology Lab?

Paper chromatography gives students hands-on experience with:

  • Designing and conducting controlled experiments
  • Observing molecular behavior and physical properties
  • Making qualitative and quantitative observations
  • Connecting lab techniques to real-world applications


It’s also a visually exciting lab. Watching vivid colors separate into bands on a strip of paper never gets old, and makes for excellent lab notebook sketches!


Ready to Try It With Your Students?

If you're looking for classroom-ready chromatography labs, I have two student-tested resources that include everything you need: detailed procedures, printable lab handouts, answer keys, and grading rubrics.

🔬 Matter Lab Stations: Ink Separation – Perfect for introducing lab skills and the scientific method in both middle and high school.

🌿 Plant Pigment Chromatography Lab – Ideal for exploring photosynthesis and leaf pigments in your high school biology class.


Both labs are designed to save you prep time while providing meaningful, standards-based instruction. You can find them in my Teachers Pay Teachers store.